How to Deposit and Withdraw
With the Steer dApp Store, users may deposit and withdraw assets into yield-generating apps as well can fund the gas for the app to run on the Steer platform.
In this guide, we will show you not only how to deposit gas to fund operations on the platform as well as how to deposit and withdraw assets into a yield-generating application as well.
Prerequisites: -
To perform these transactions you’ll need to connect a compatible crypto wallet to the platform. If you haven’t and still need to learn how to in our previous guide “How to Connect Your Wallet.”
Depositing Assets Into Yield Generating Apps
One of the most straightforward ways to utilize Steer’s financial tools without any coding knowledge is to become a Liquidity Provider or “LP.” LPs do just that, provide liquid assets to “liquidity pools” of tied assets which are then made available to traders to draw from in order to have sufficient funds on hand to perform trade transactions. Why would you want to just give your money to someone else so they can make money off of trading your assets? Because there’s an incentive for you too, my friend! With each yield-generating application available on the Steer dApp Store you’ll see an estimated Annual Percentage Yield or ‘APY,’ a projected percentage representing your Return on Investment of ‘ROI,’ a hypothetical but algorithmically estimated profit as a reward for your investment in a liquidity pool.
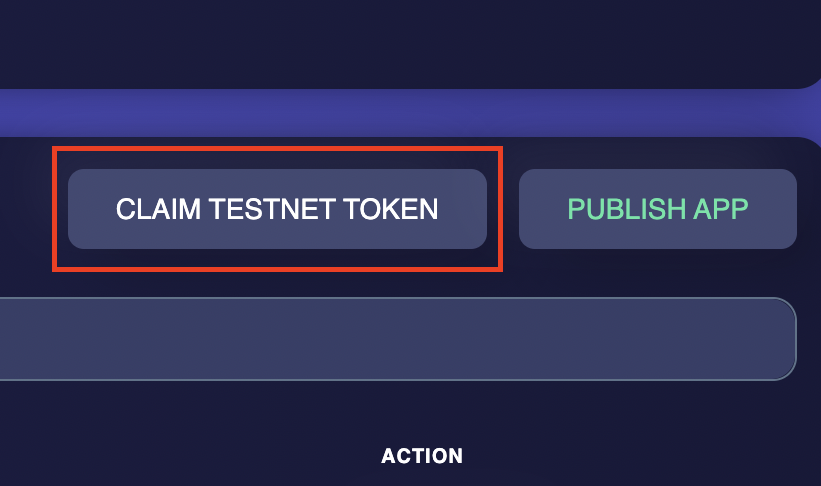
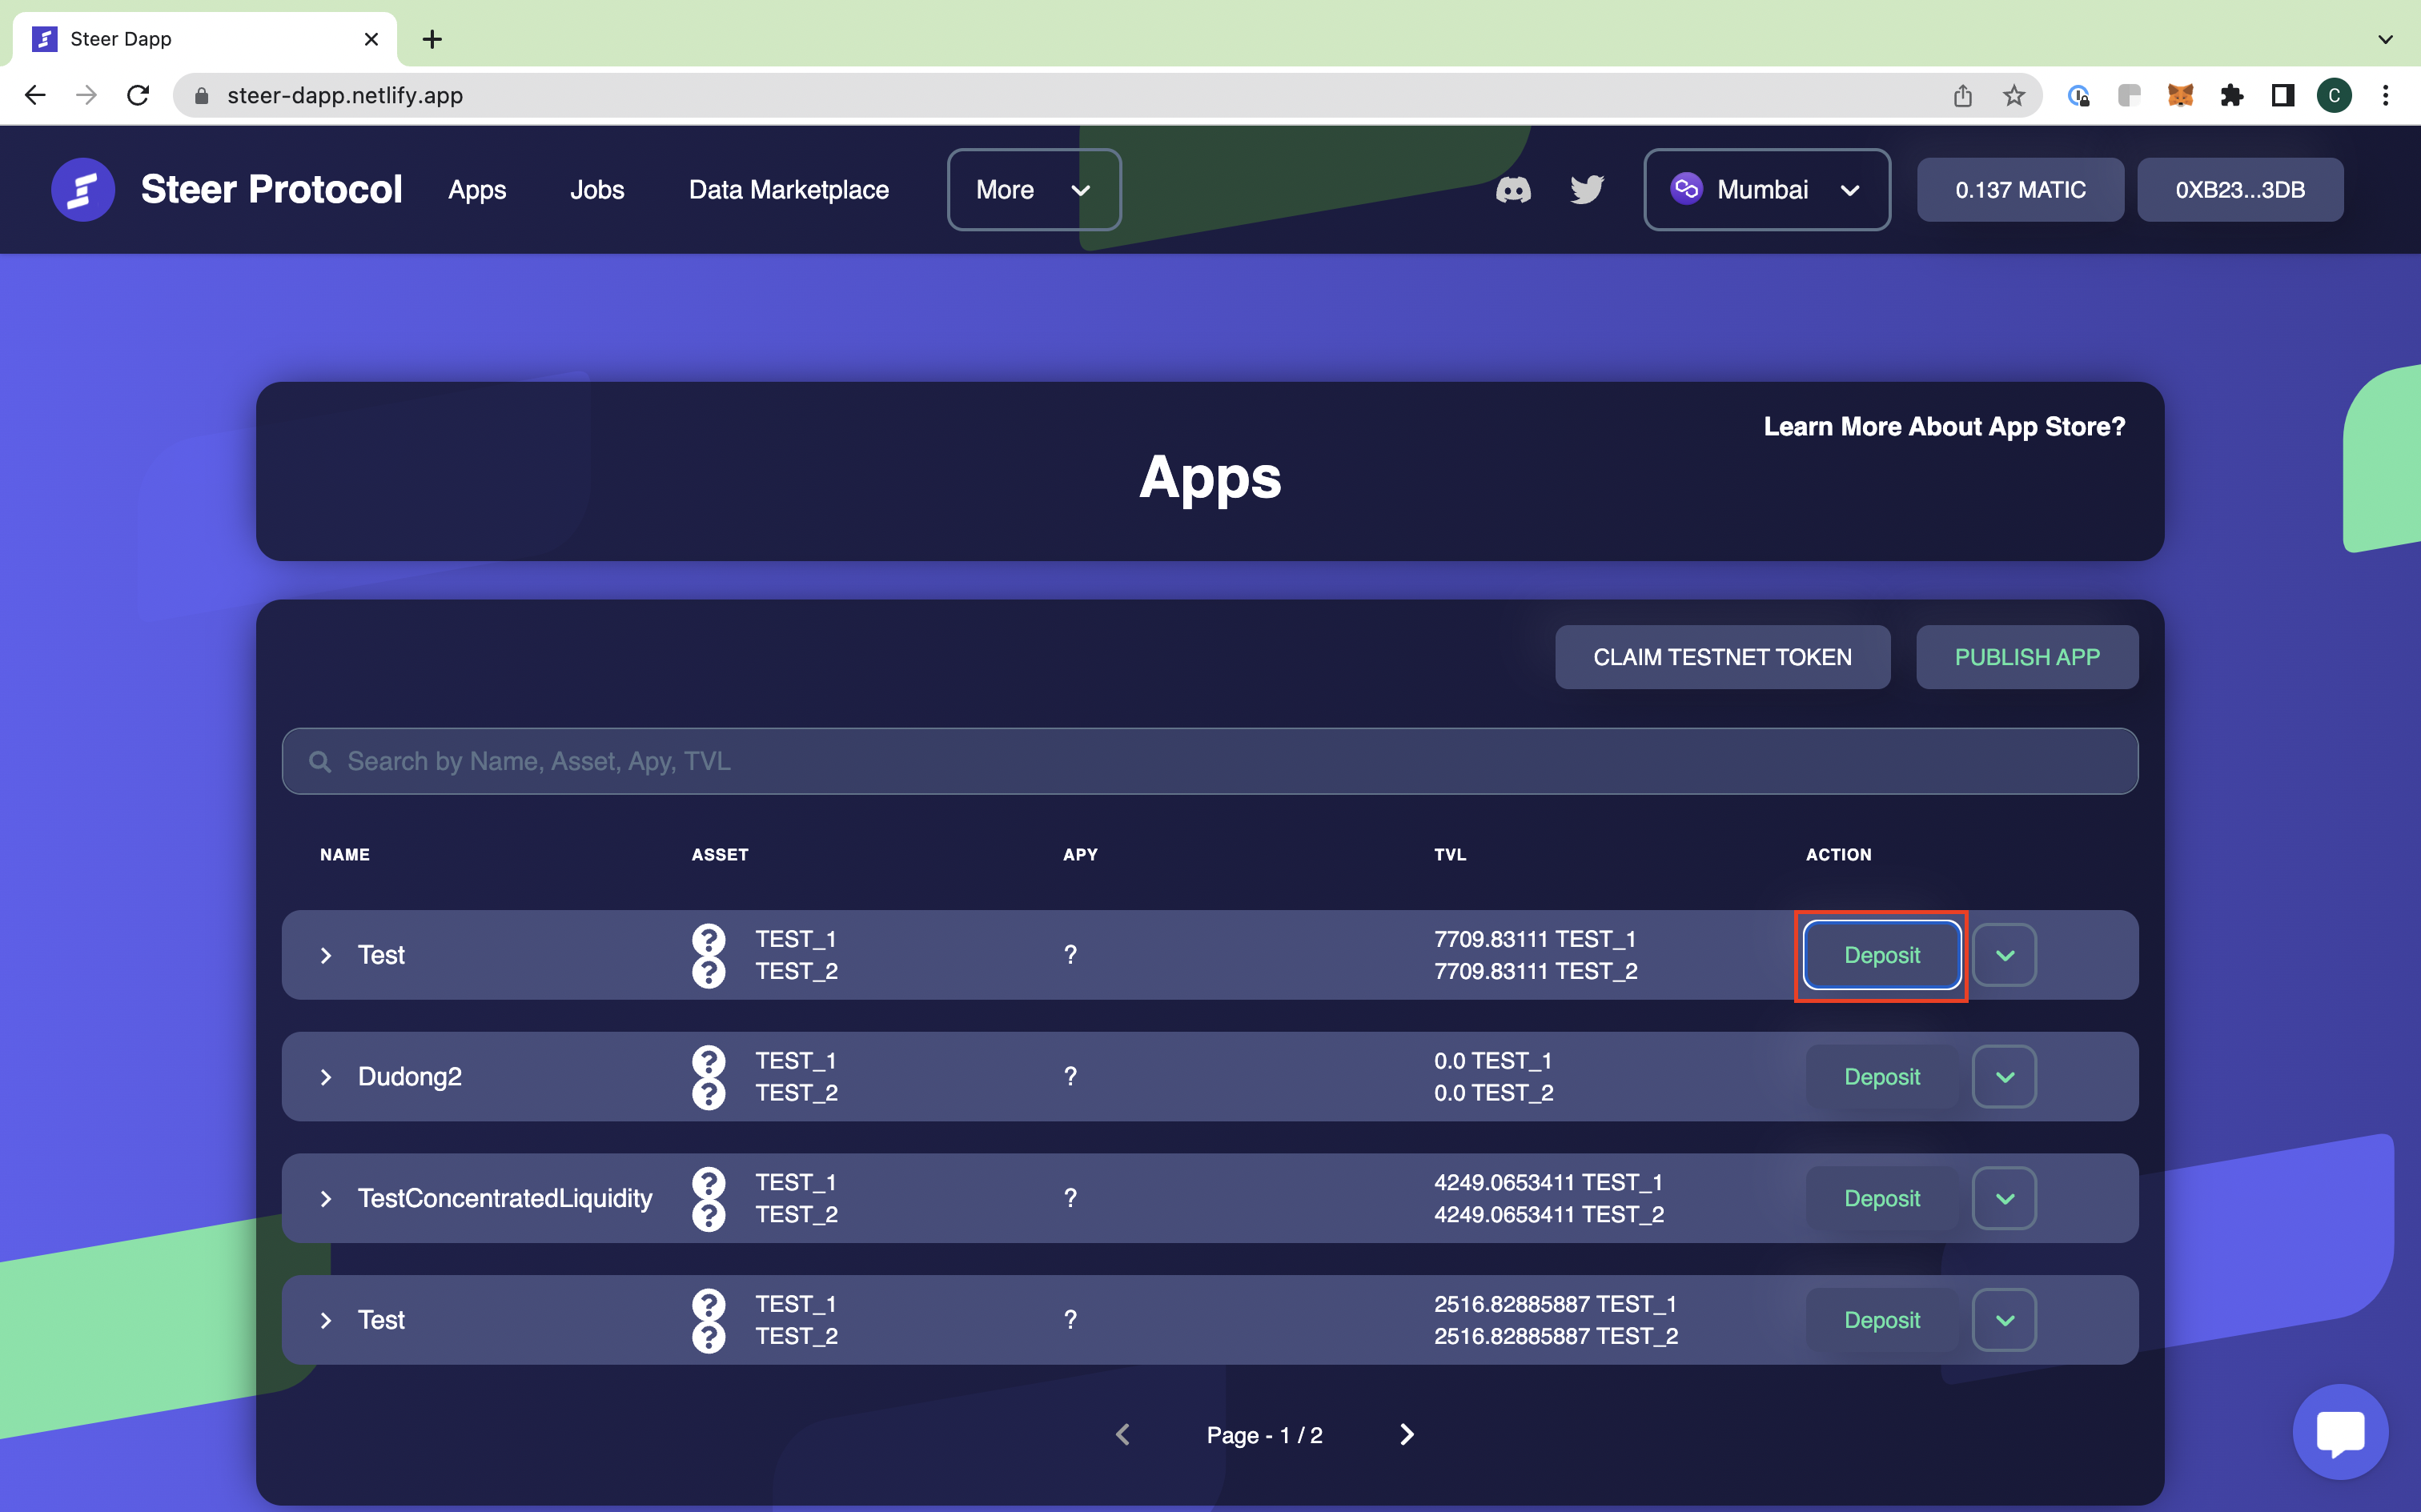
Associated with each yield-generating application you’ll see a pair of supported assets that are housed in the application’s liquidity pool and traded against one another. These are the coins you’ll be required to deposit as liquidity to participate in the application. Draw your attention to the initial app on the list titled ‘Test,’ and notice under the ‘assets’ column where ‘Test 1’ and ‘Test 2’ are listed. These are the coins associated with this particular strategy and thus, those which you’ll need to provide as liquidity to invest in this given app. To continue, click “Get Testnet Token” to acquire the ‘Test 1’ and ‘Test 2’ coins after performing a transaction between the platform and your wallet.
Once you’ve acquired the coins necessary to participate with the dApp and are back on the ‘App’ page, click the ‘Deposit’ button on the right of the dApp’s row under the ‘Action’ column.
This will trigger a modal that will ask you what ratio of liquidity in ‘Test 1’ and ‘Test 2’ tokens you care to invest. You will also be asked to decide on how much ‘slippage’ you’d like to allocate in the execution of your deposit. Also: note the final row called “LP Token: Str_75.” The amount of this ‘LP Token’ is your marker of value for investing in the App’s liquidity pool and determines your projected proportional share of the yield.
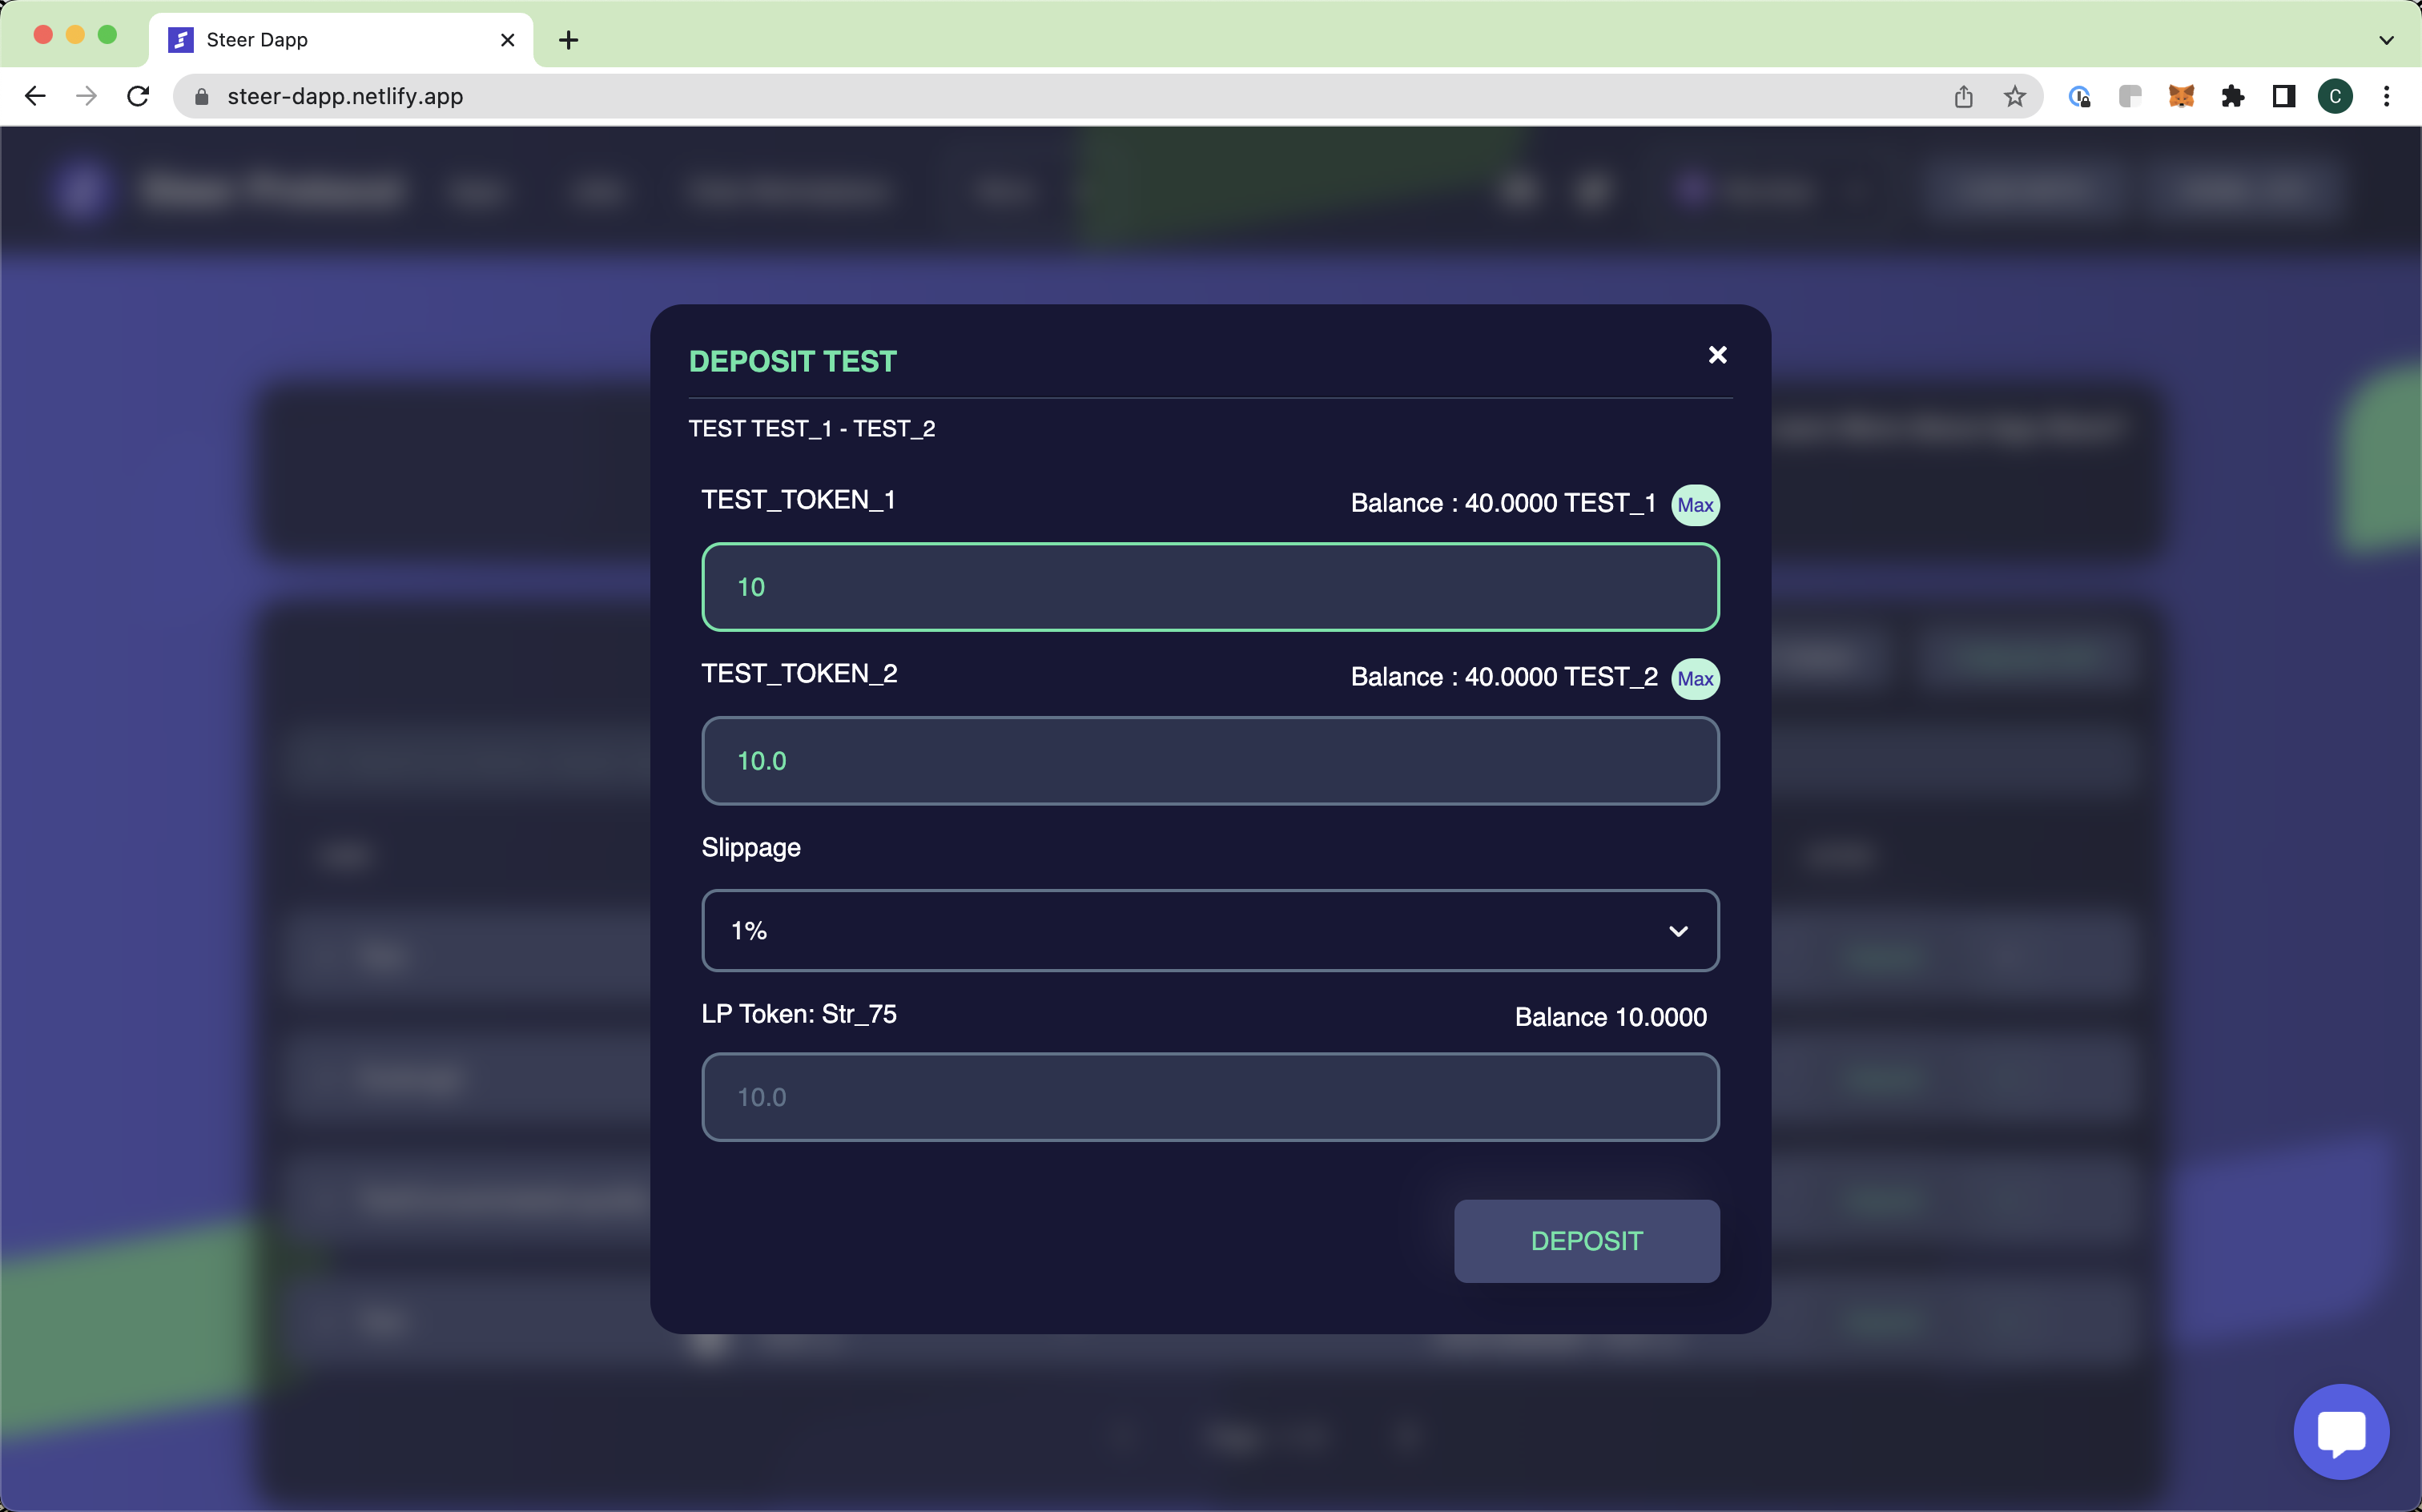
Once the deposit transactions for both coins have been successfully executed, check your connected wallet assets. You’ll notice a sum of ‘LP Tokens’ proportional in balance to your investment of ‘Test 1’ and ‘Test 2’ tokens deposited. Congratulations! You’ve made your first liquidity deposit on a yield-generating dApp with Steer and a major step forward in your DeFi future.
Withdrawing Assets From Yield Generating Apps
To withdraw your liquidity from the application, click the button shaped like a downward arrow to the right of the ‘Action’ button on the app’s row to trigger a drop-down menu. Select ‘Withdraw,’ and in almost the exact process of steps as you did when you deposited, select how much of the ‘Liquidity Token’ you’d like to give back in return for withdrawing your liquidity. You will then see how much you will receive by withdrawing relative to the amount of ‘Liquidity Tokens’ returned.
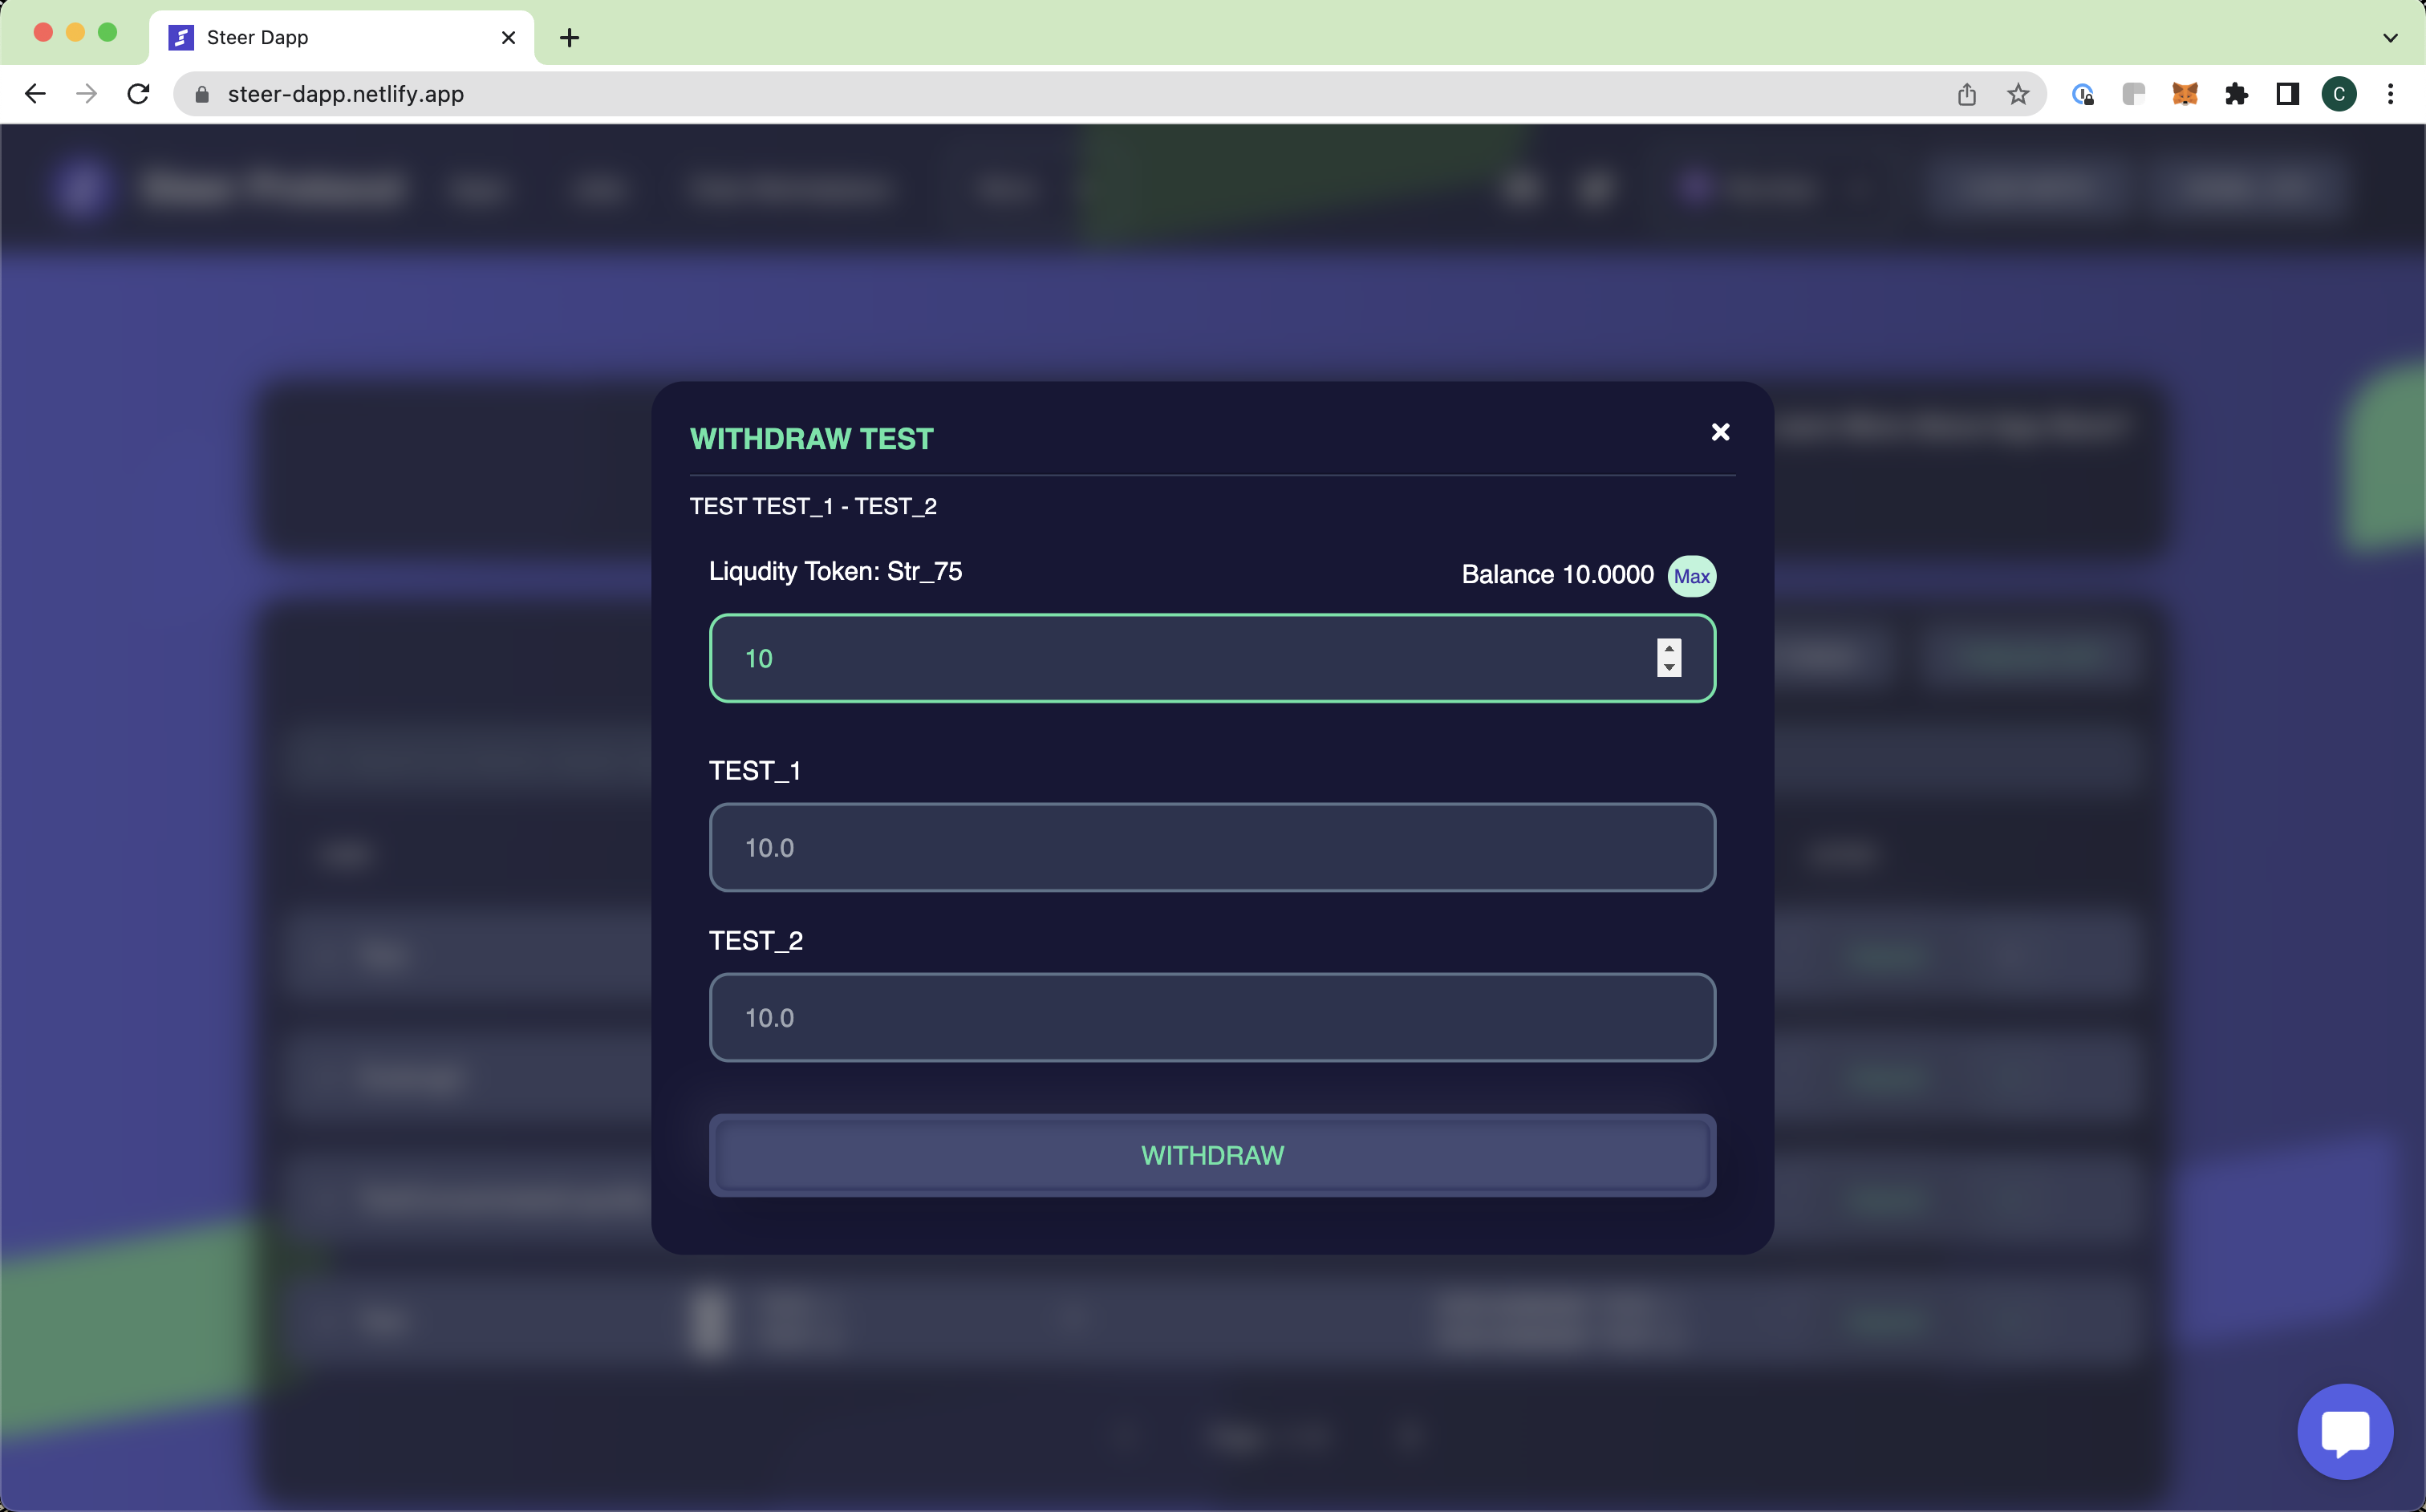
Select ‘Withdraw’ to trigger the transaction window with your connected wallet and press confirm to execute. If successful, you will find the appropriate amount of coins withdrawn from the application returned to your wallet.
Depositing Gas to Fund Yield-Generating Apps
‘Gas’ is the fee paid to a miner for facilitating your transaction on their machine and is relative to how busy the network the platform is supported by happens to be; the busier the network at any given time, the more amount of jobs to process, and the higher the gas price. In order to fund execution for the dApps you’ve invested or like in on Steer dApp Store, you’ll need to have the gas required to fund their operation deposited. No one likes to waste resources so we’ve proudly built our protocol to be as gas efficient as possible with our users consciously in mind.
To begin this process, click the same downward arrow-shaped button as you did to withdraw liquidity from the app but instead select “Fund Gas.” A modal will appear displaying the amount of liquidity invested as gas to fund the function of the app, while also asking how much you would like to contribute personally.
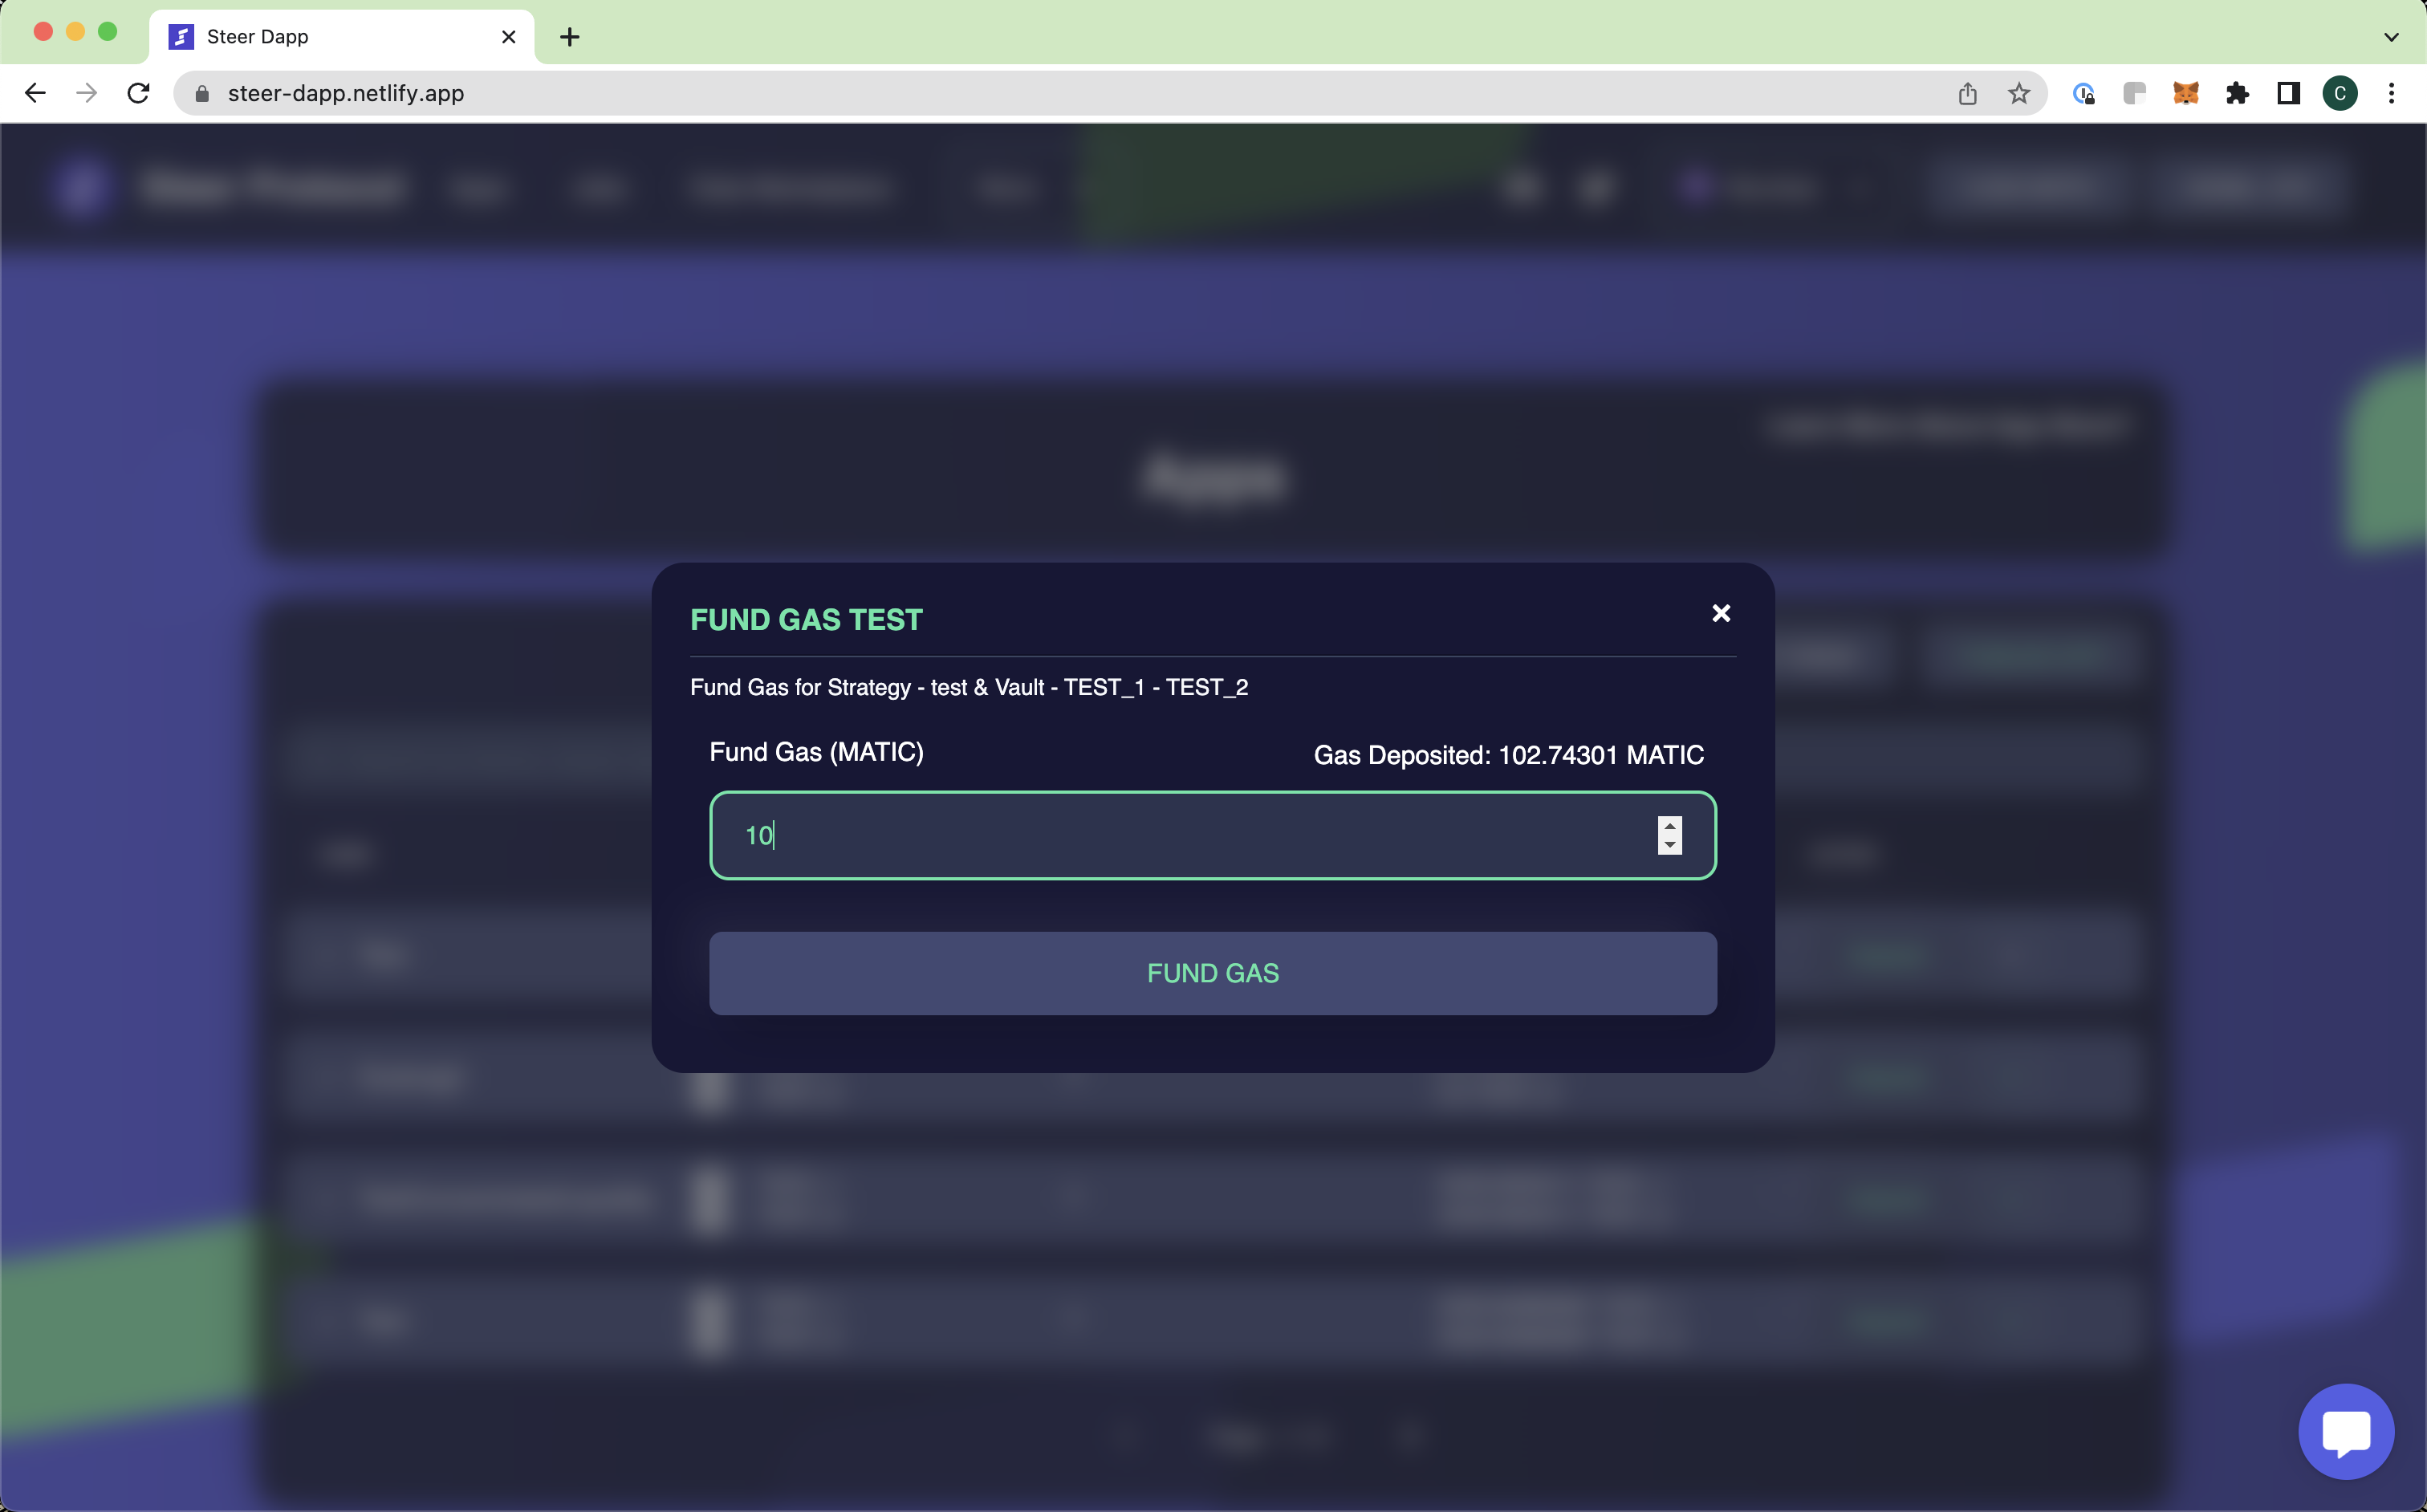
“Fund” is a telling choice of words to describe this action as you essentially donate to the collective gas tank for this application. It is important to note that because this is a collective gas vault, once a gas deposit has been made it is not possible for an individual user to make a withdrawal and recoup their stake. This is done as security to assure the application will always have enough gas to execute its functions.
Depositing Gas to Fund Jobs
Once you’ve accomplished connecting your wallet, you’ll need to fund your wallet address-associated vault which you created while registering a job. Think of your assets stored here as literal ‘gas’ to cover necessary transaction expenditures (fees paid to a node runner to execute your transaction) and this vault as the ‘tank’ where the gas for your jobs is stored.
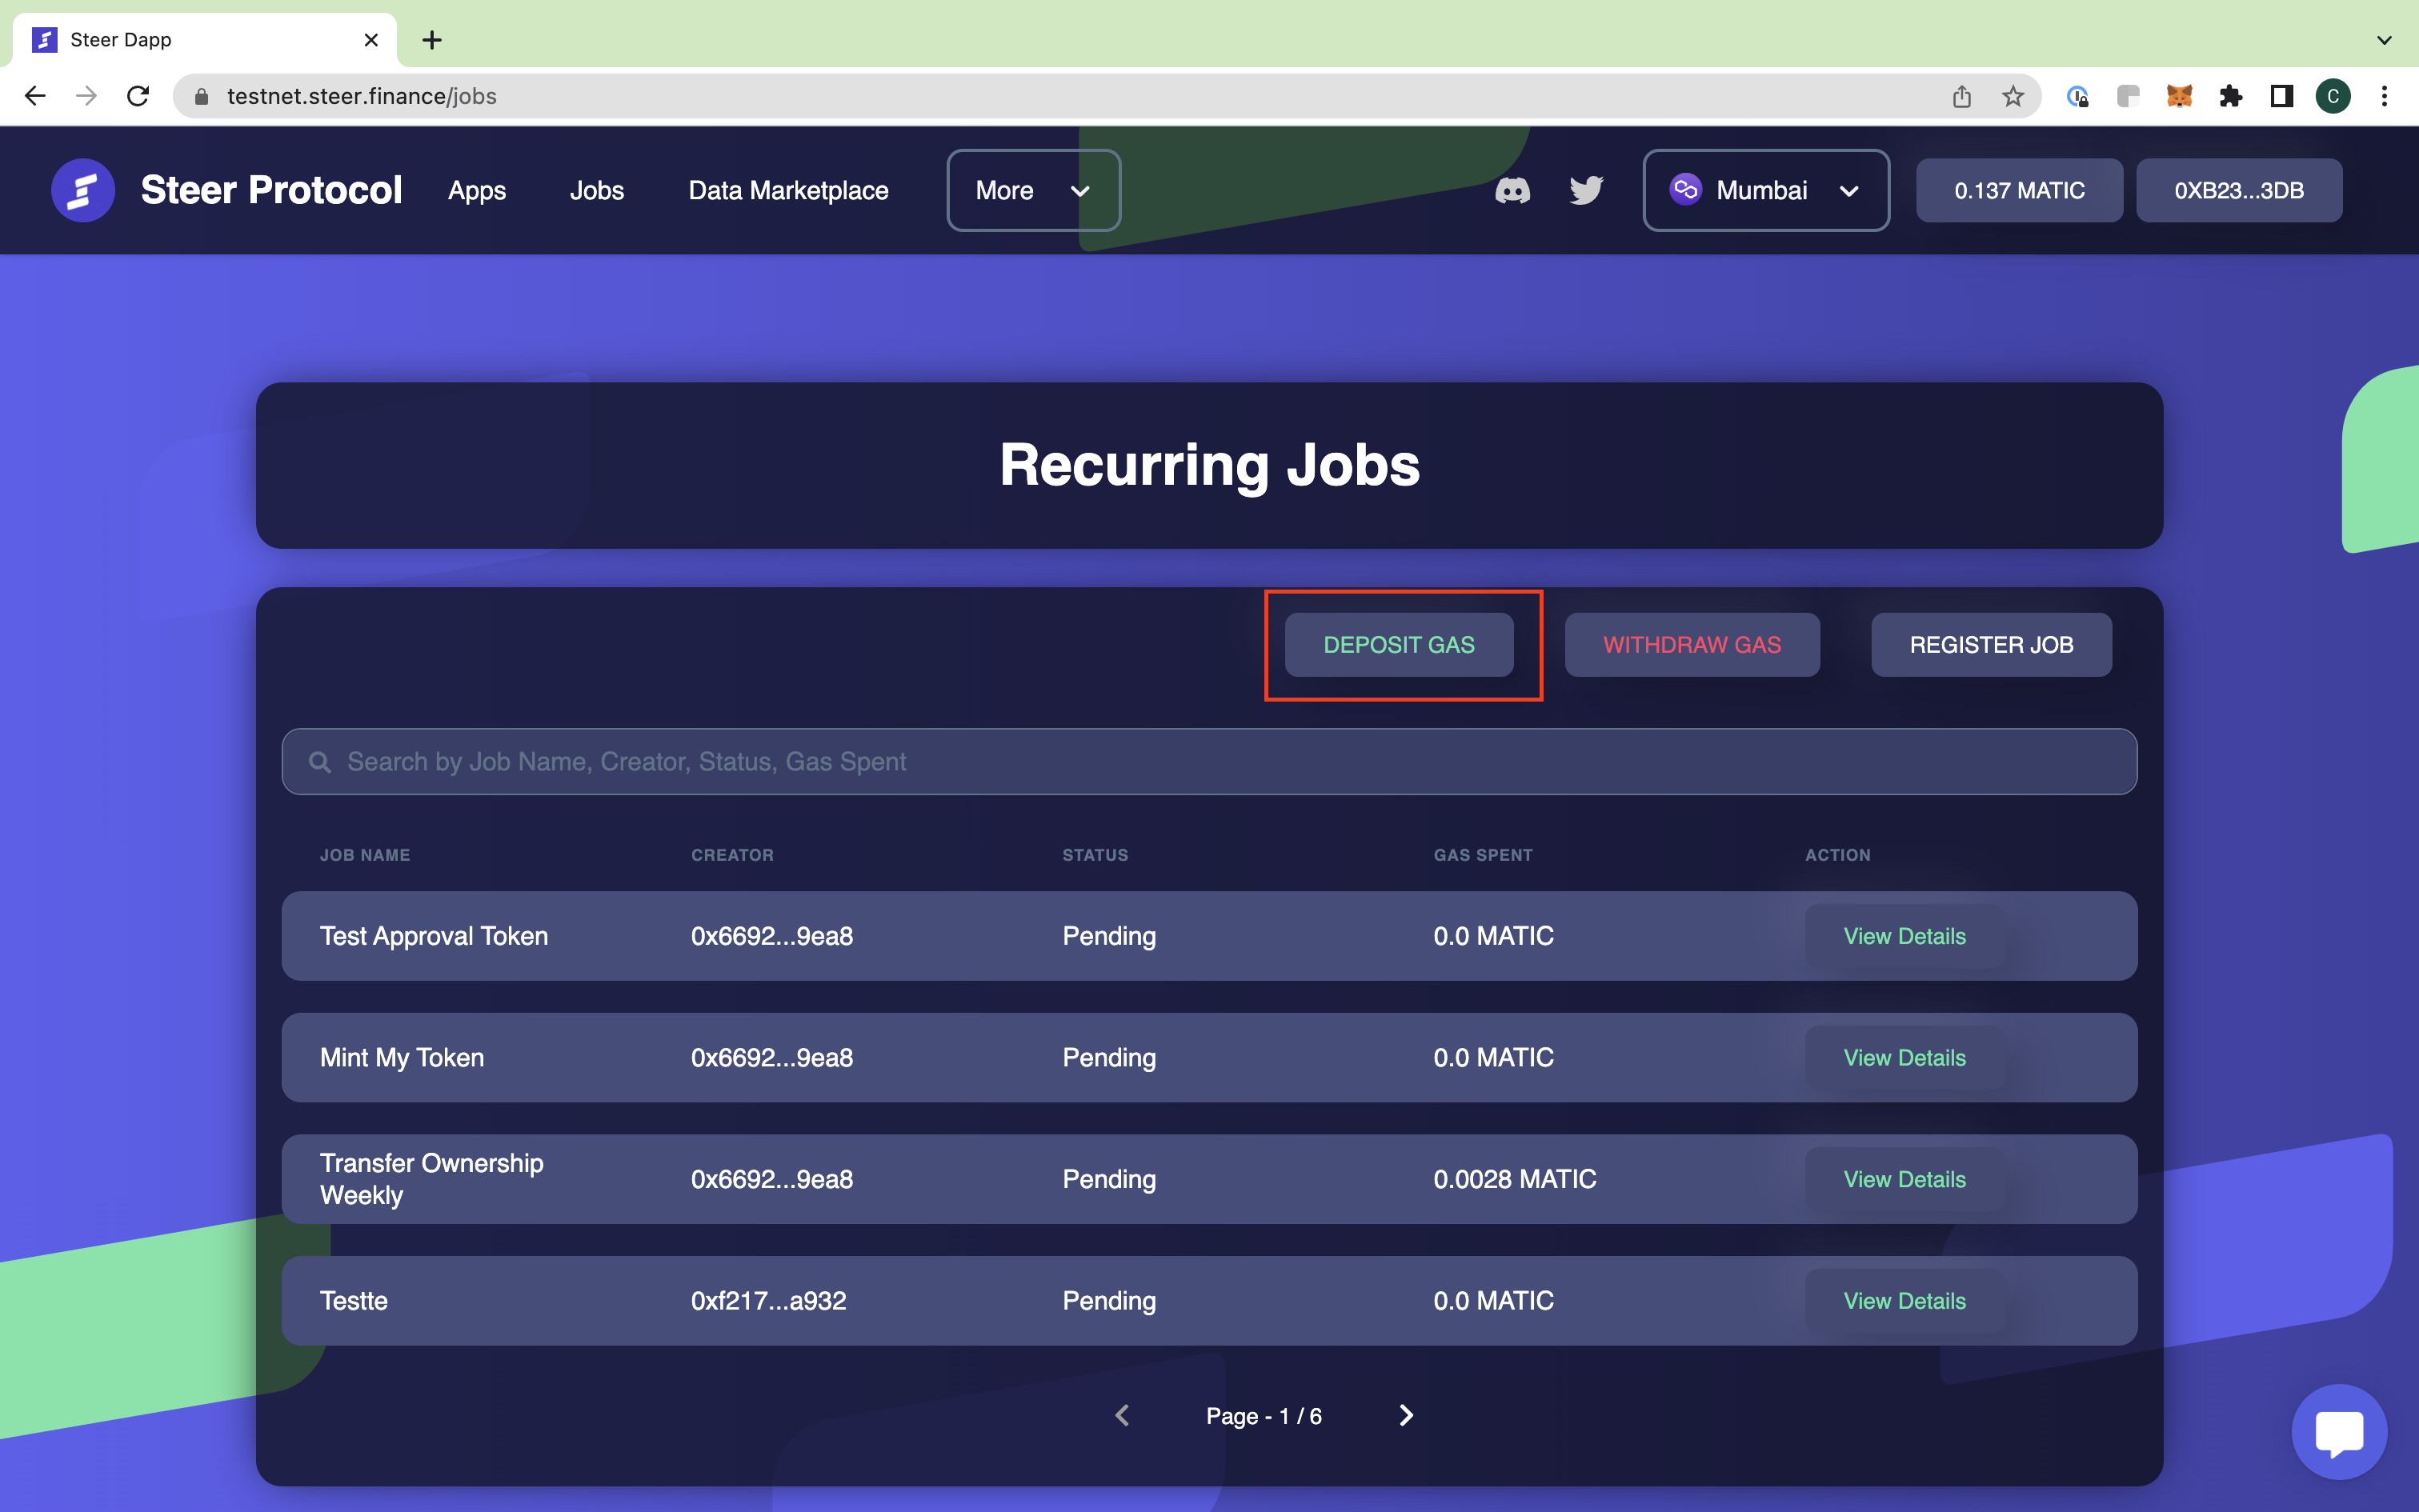
When you open the platform on your web browser, click the text ‘Jobs’ in the top left of the screen to bring you to the main ‘Jobs’ page. Here you can see which jobs are available to run and where you can deposit and withdraw gas to fund their operation. When the creation of your vault has successfully been executed you’ll notice the “deposit gas” and “withdraw gas” buttons have become active and changed color from gray to green and red, respectively. You’ve now completed the steps necessary to fund gas for your jobs! Click deposit to select the amount of funds you’d like to place within your vault.
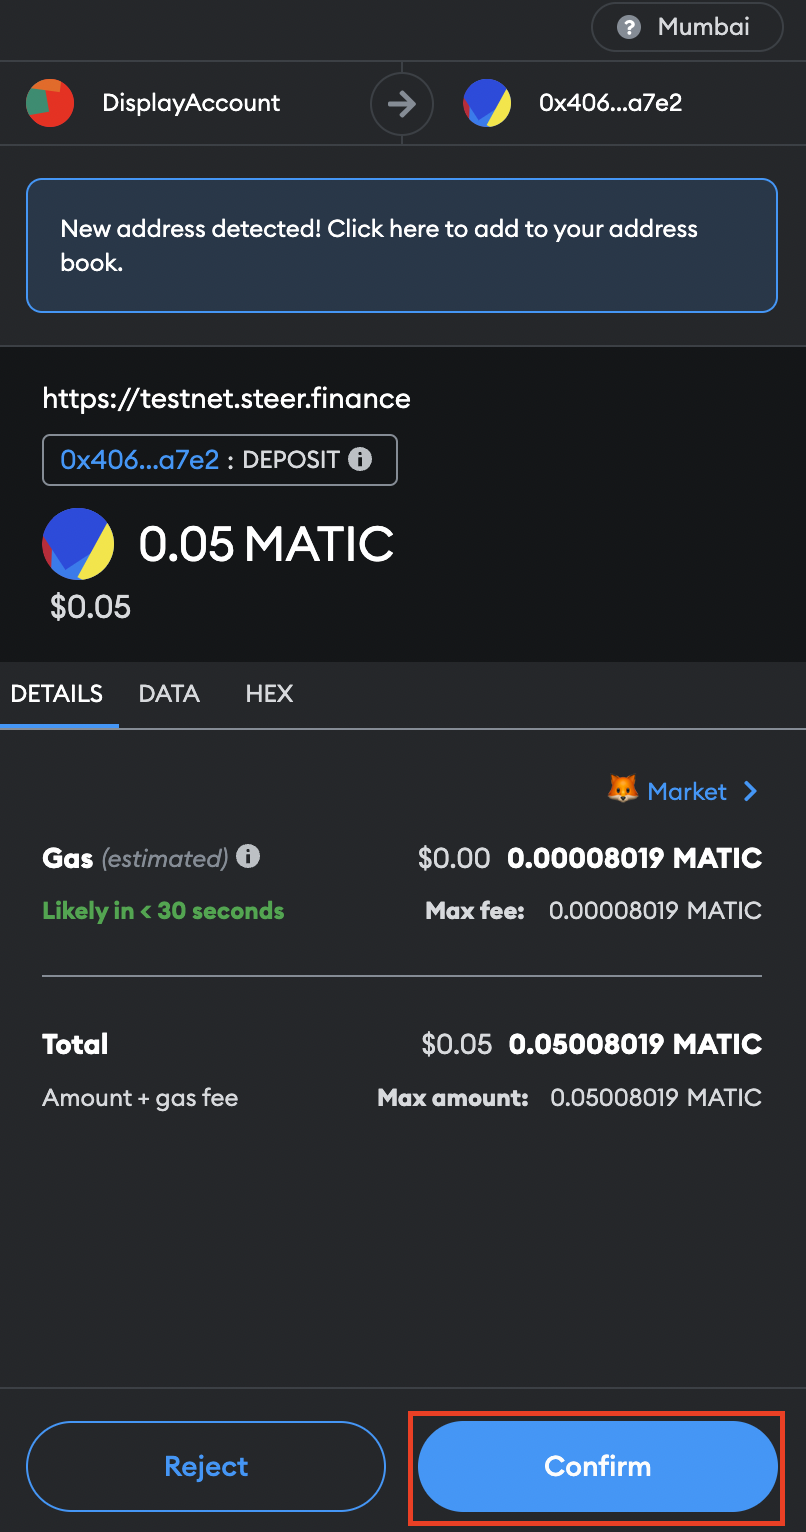
In the entry field of the modal you are presented with, select how much of your asset you’d like to deposit into your ‘gas tank’ vault. Click ‘fund gas’ to execute your deposit. Note: make sure you have the appropriate assets in your wallet to fund your deposit, otherwise the transaction will fail.
You’ll next be asked to confirm the transaction (depositing gas in your tank) in a pop-up window with the applicable gas fees to fund the deposit transaction as they show in real time. Click ‘approve’ to execute the deposit.
You’ll then be notified of the job being run…
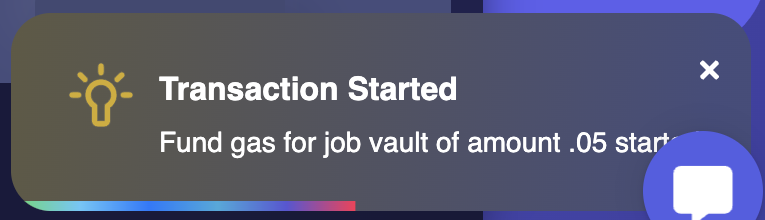
…and if successfully executed, notified accordingly! Also, notice the reflection of the asset balance in your wallet displayed on the page as evidence of a successfully executed transaction.
Note: For your knowledge, this procedure will occur the exact same way for every transaction you make with your wallet on the platform, regardless of the action.
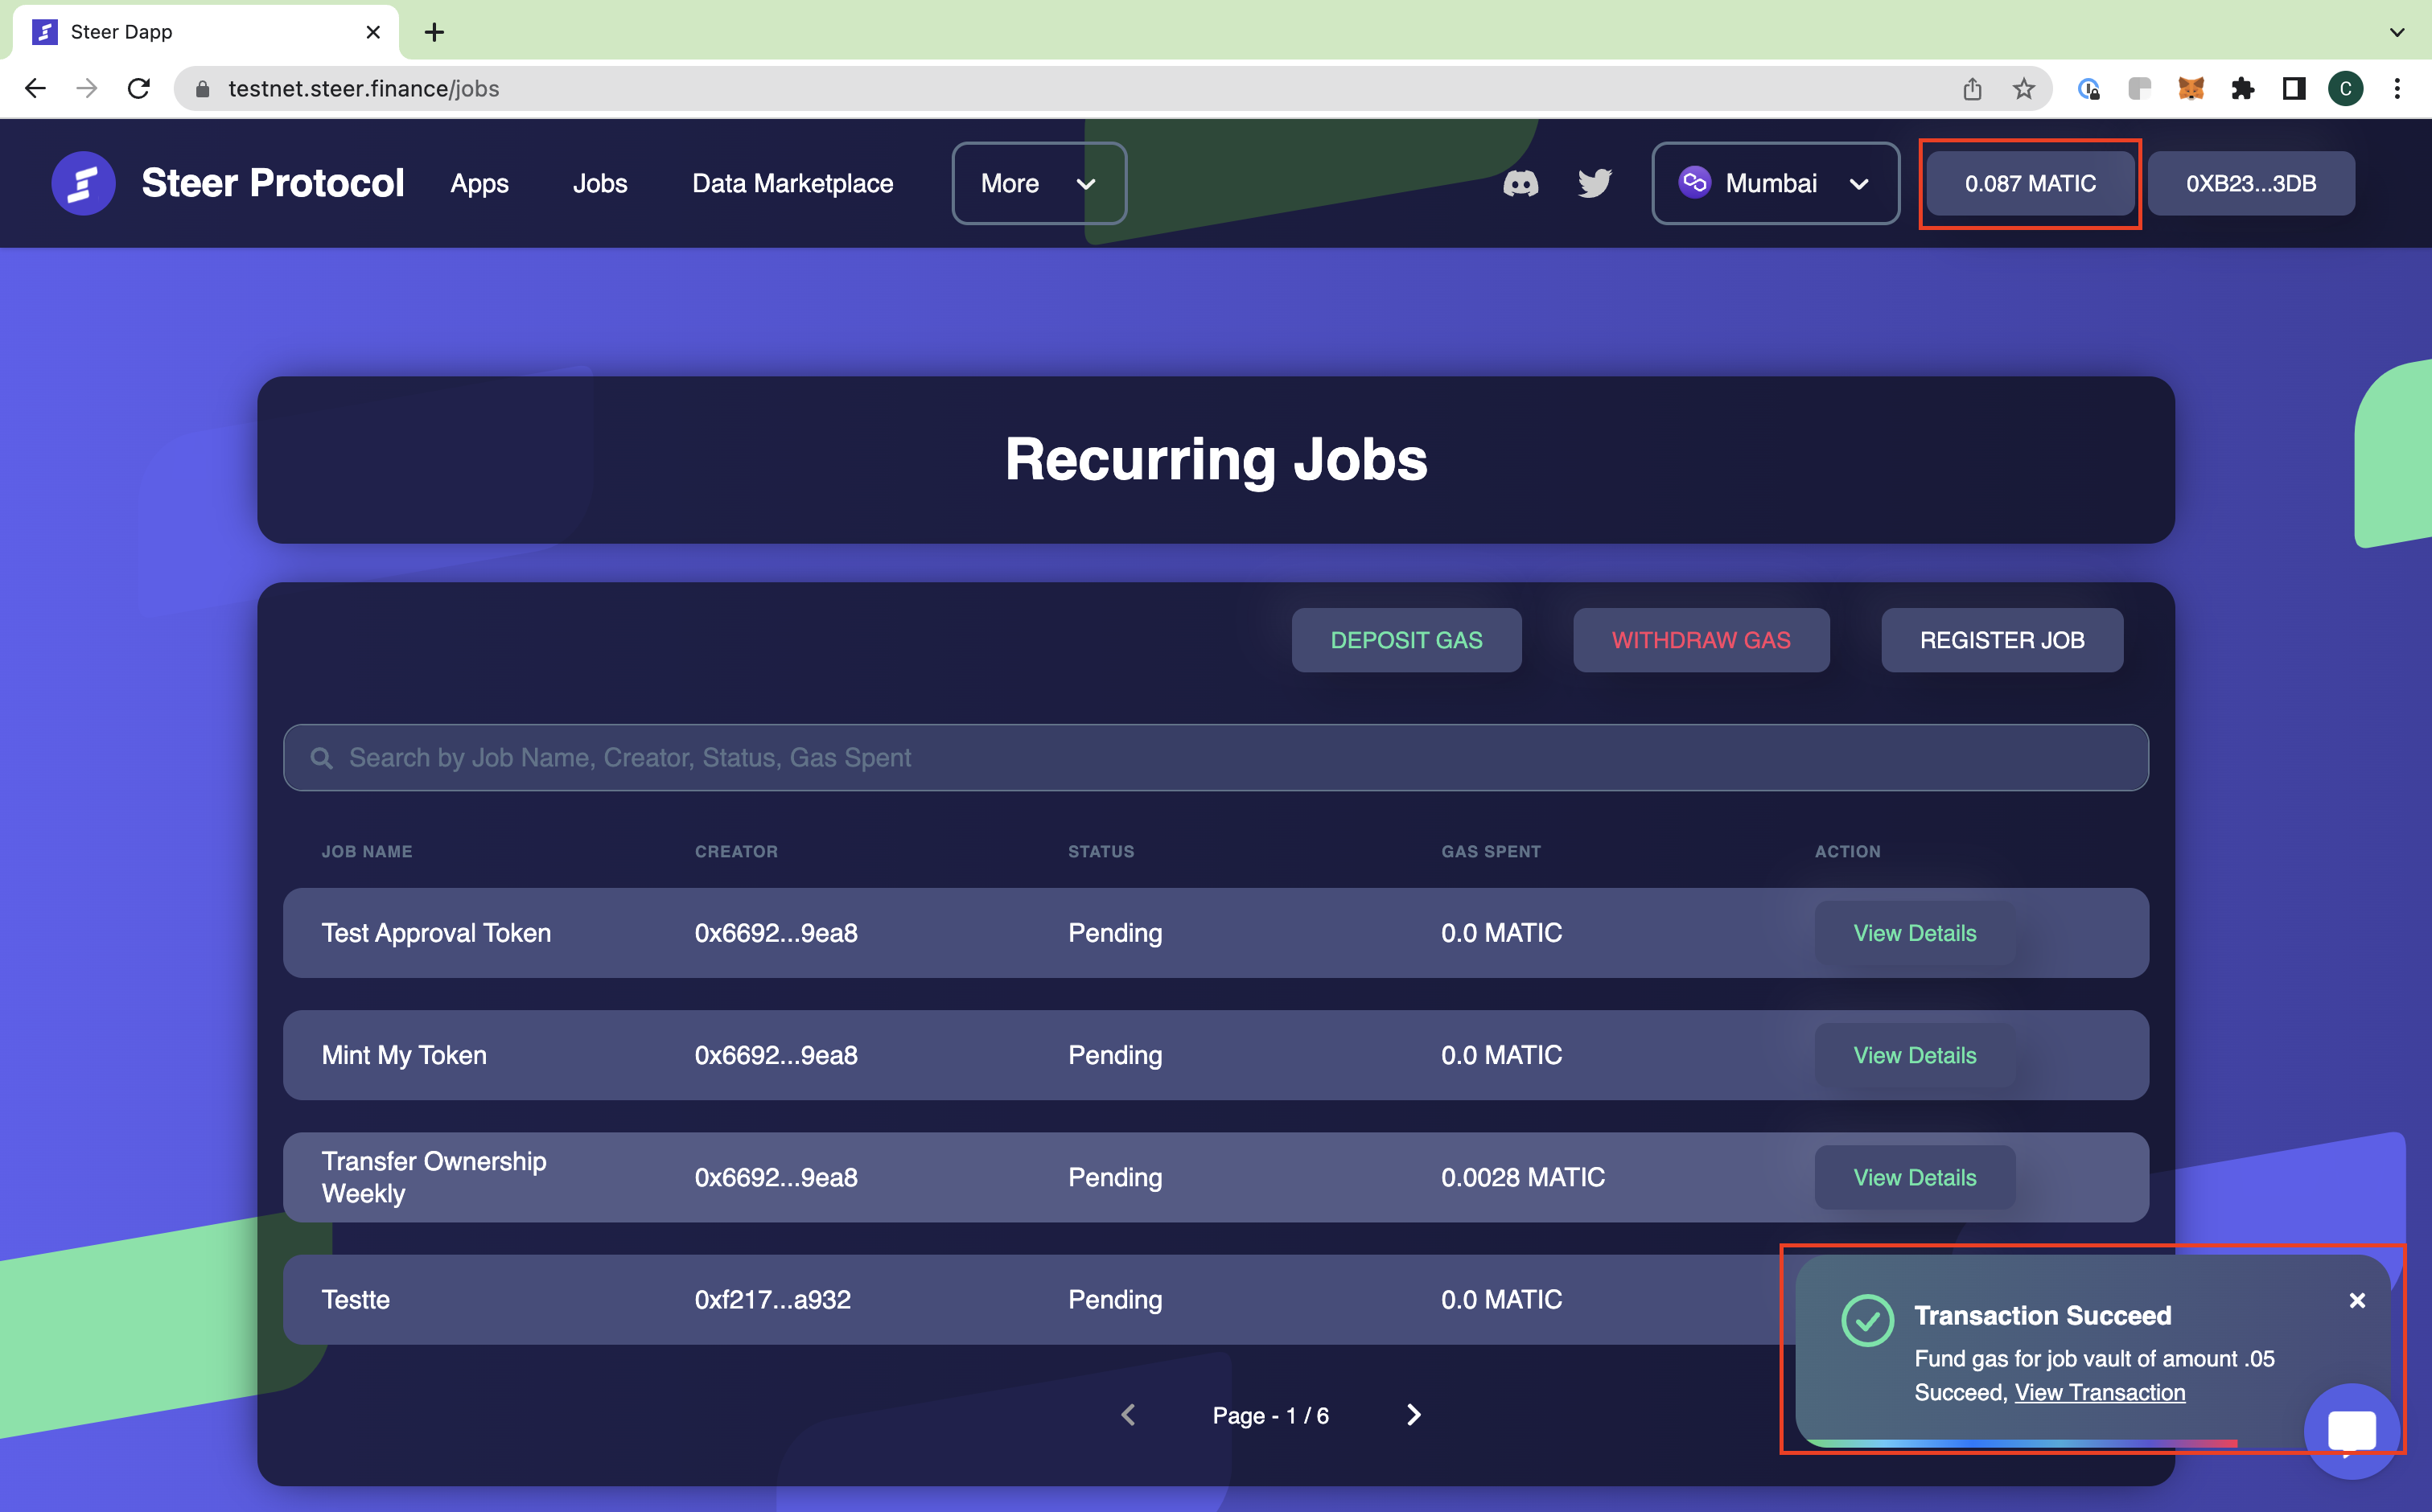
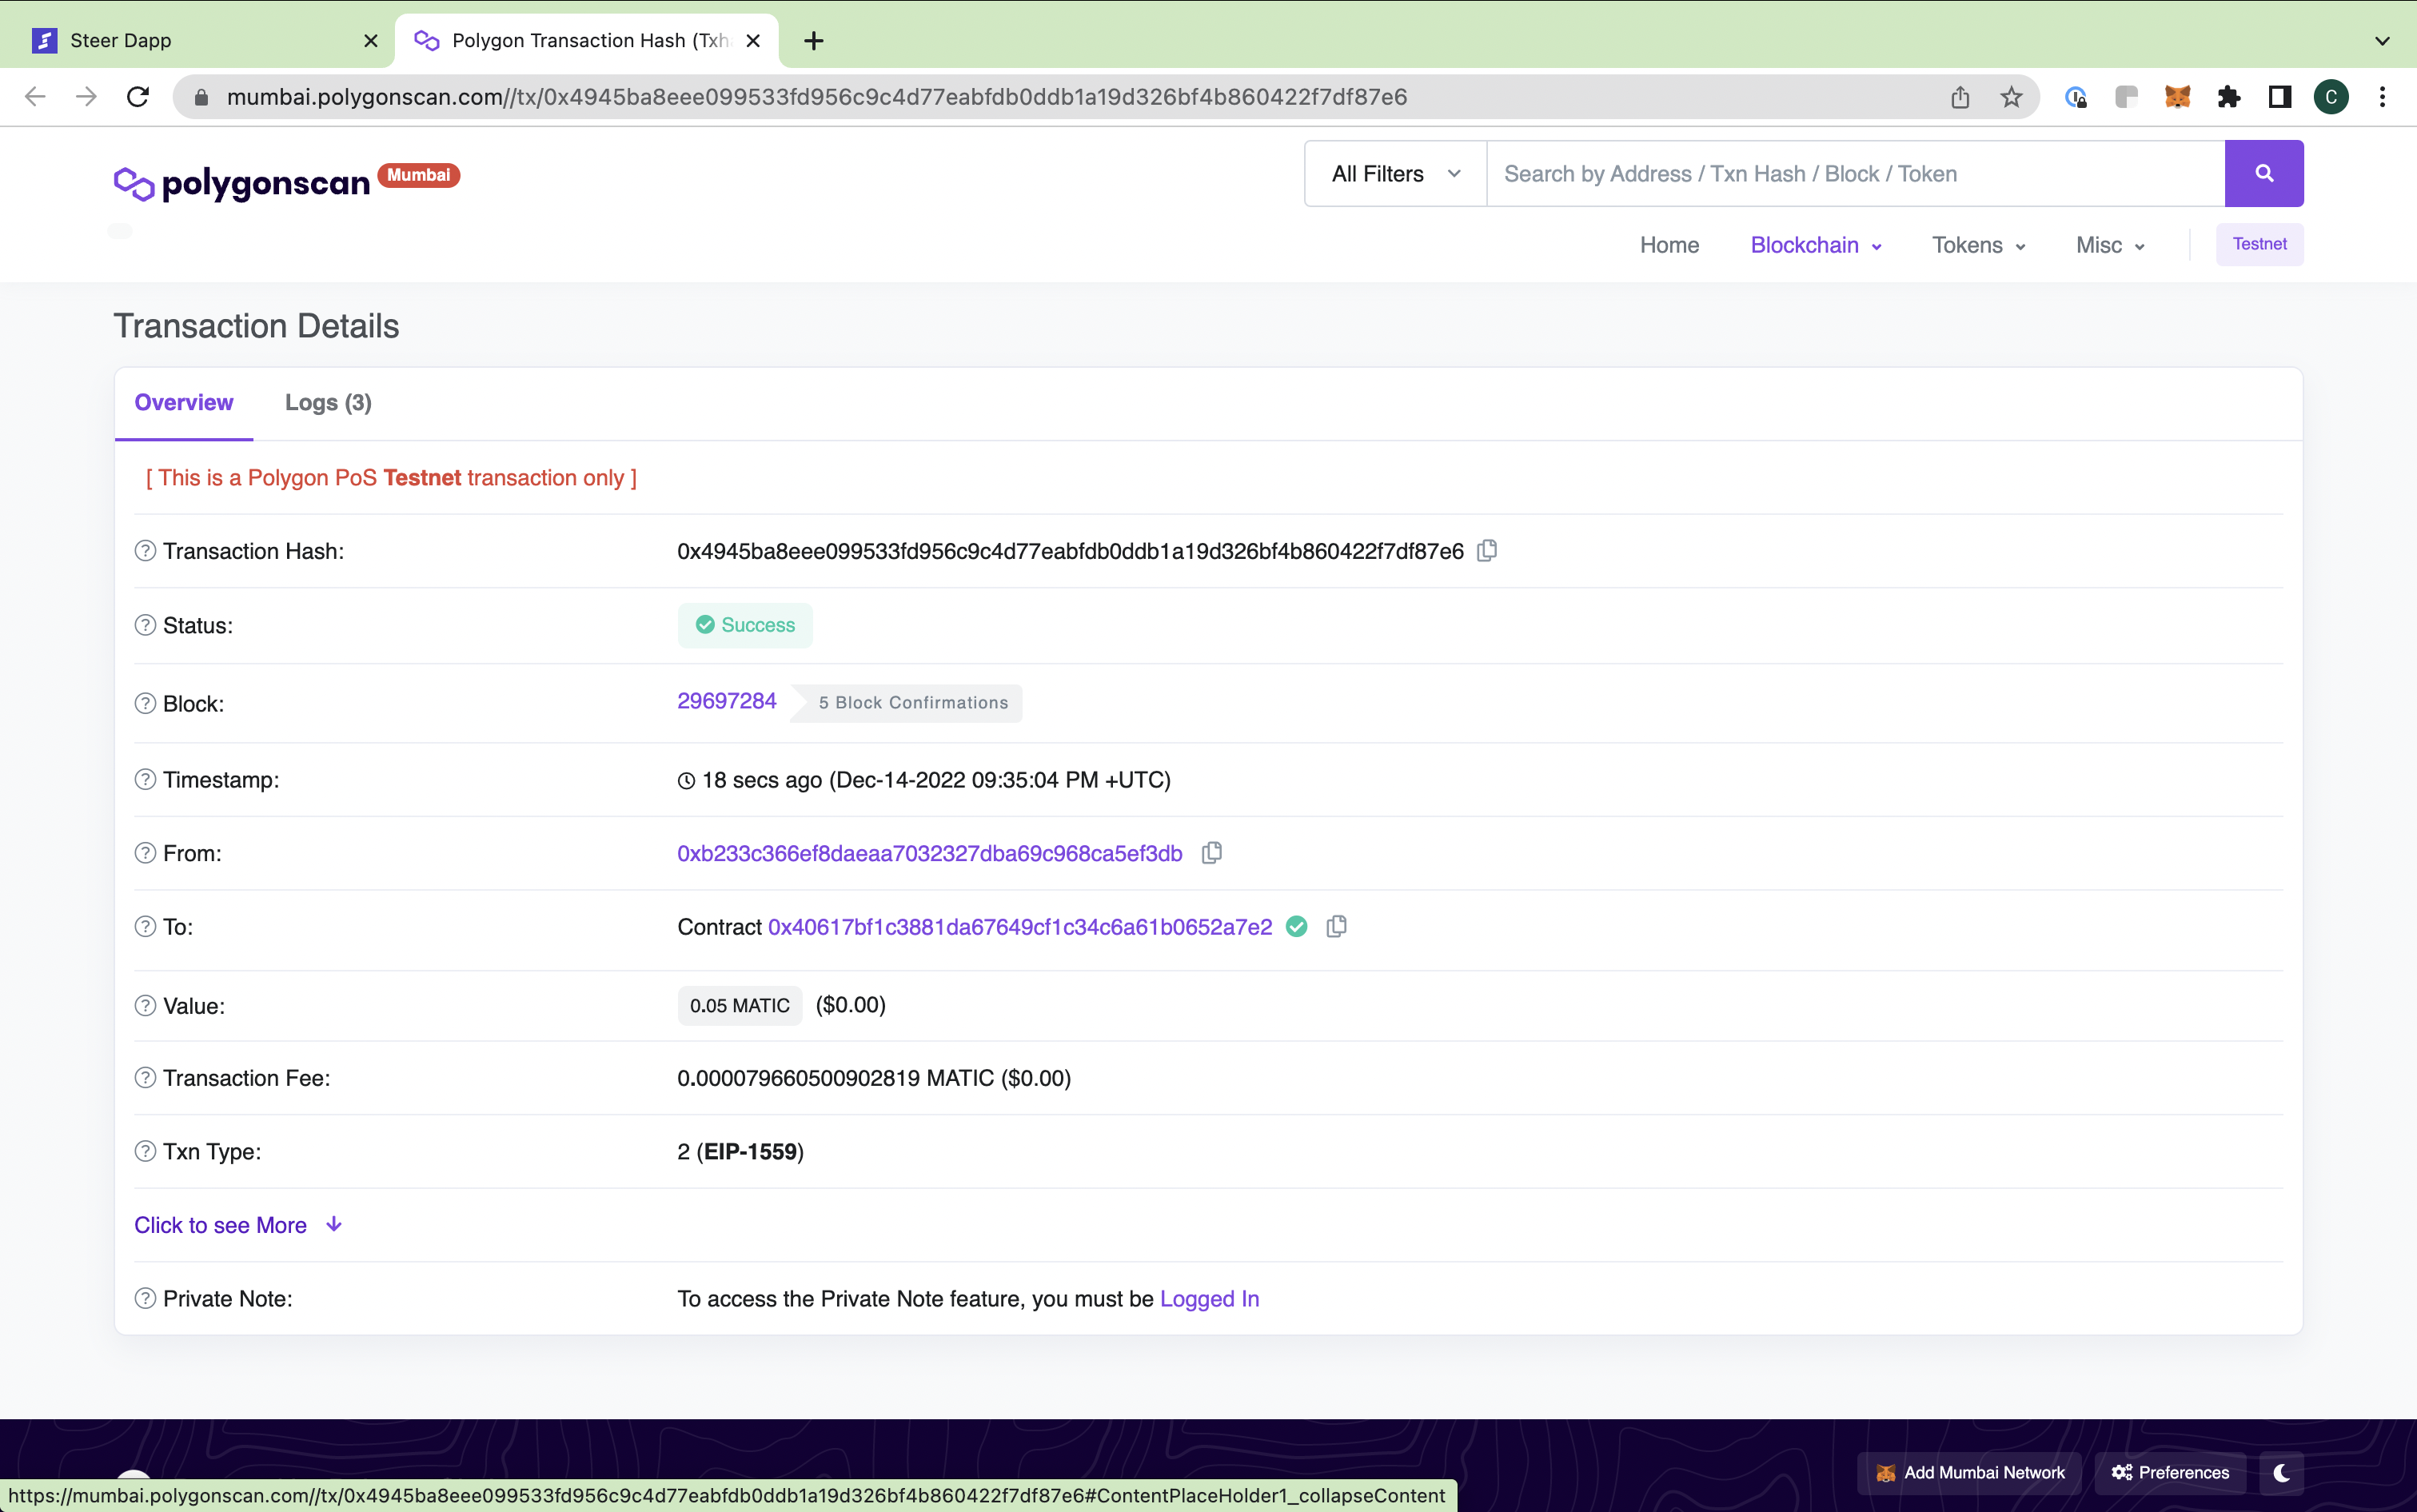
You can also view a detailed report of the transaction by clicking “View Transaction” in the notification window of a successful transaction.

This will take you to the hash for the transaction you’ve completed on ‘scan’ site for the network you are operating on (poylgonscan or etherscan) for a full breakdown.
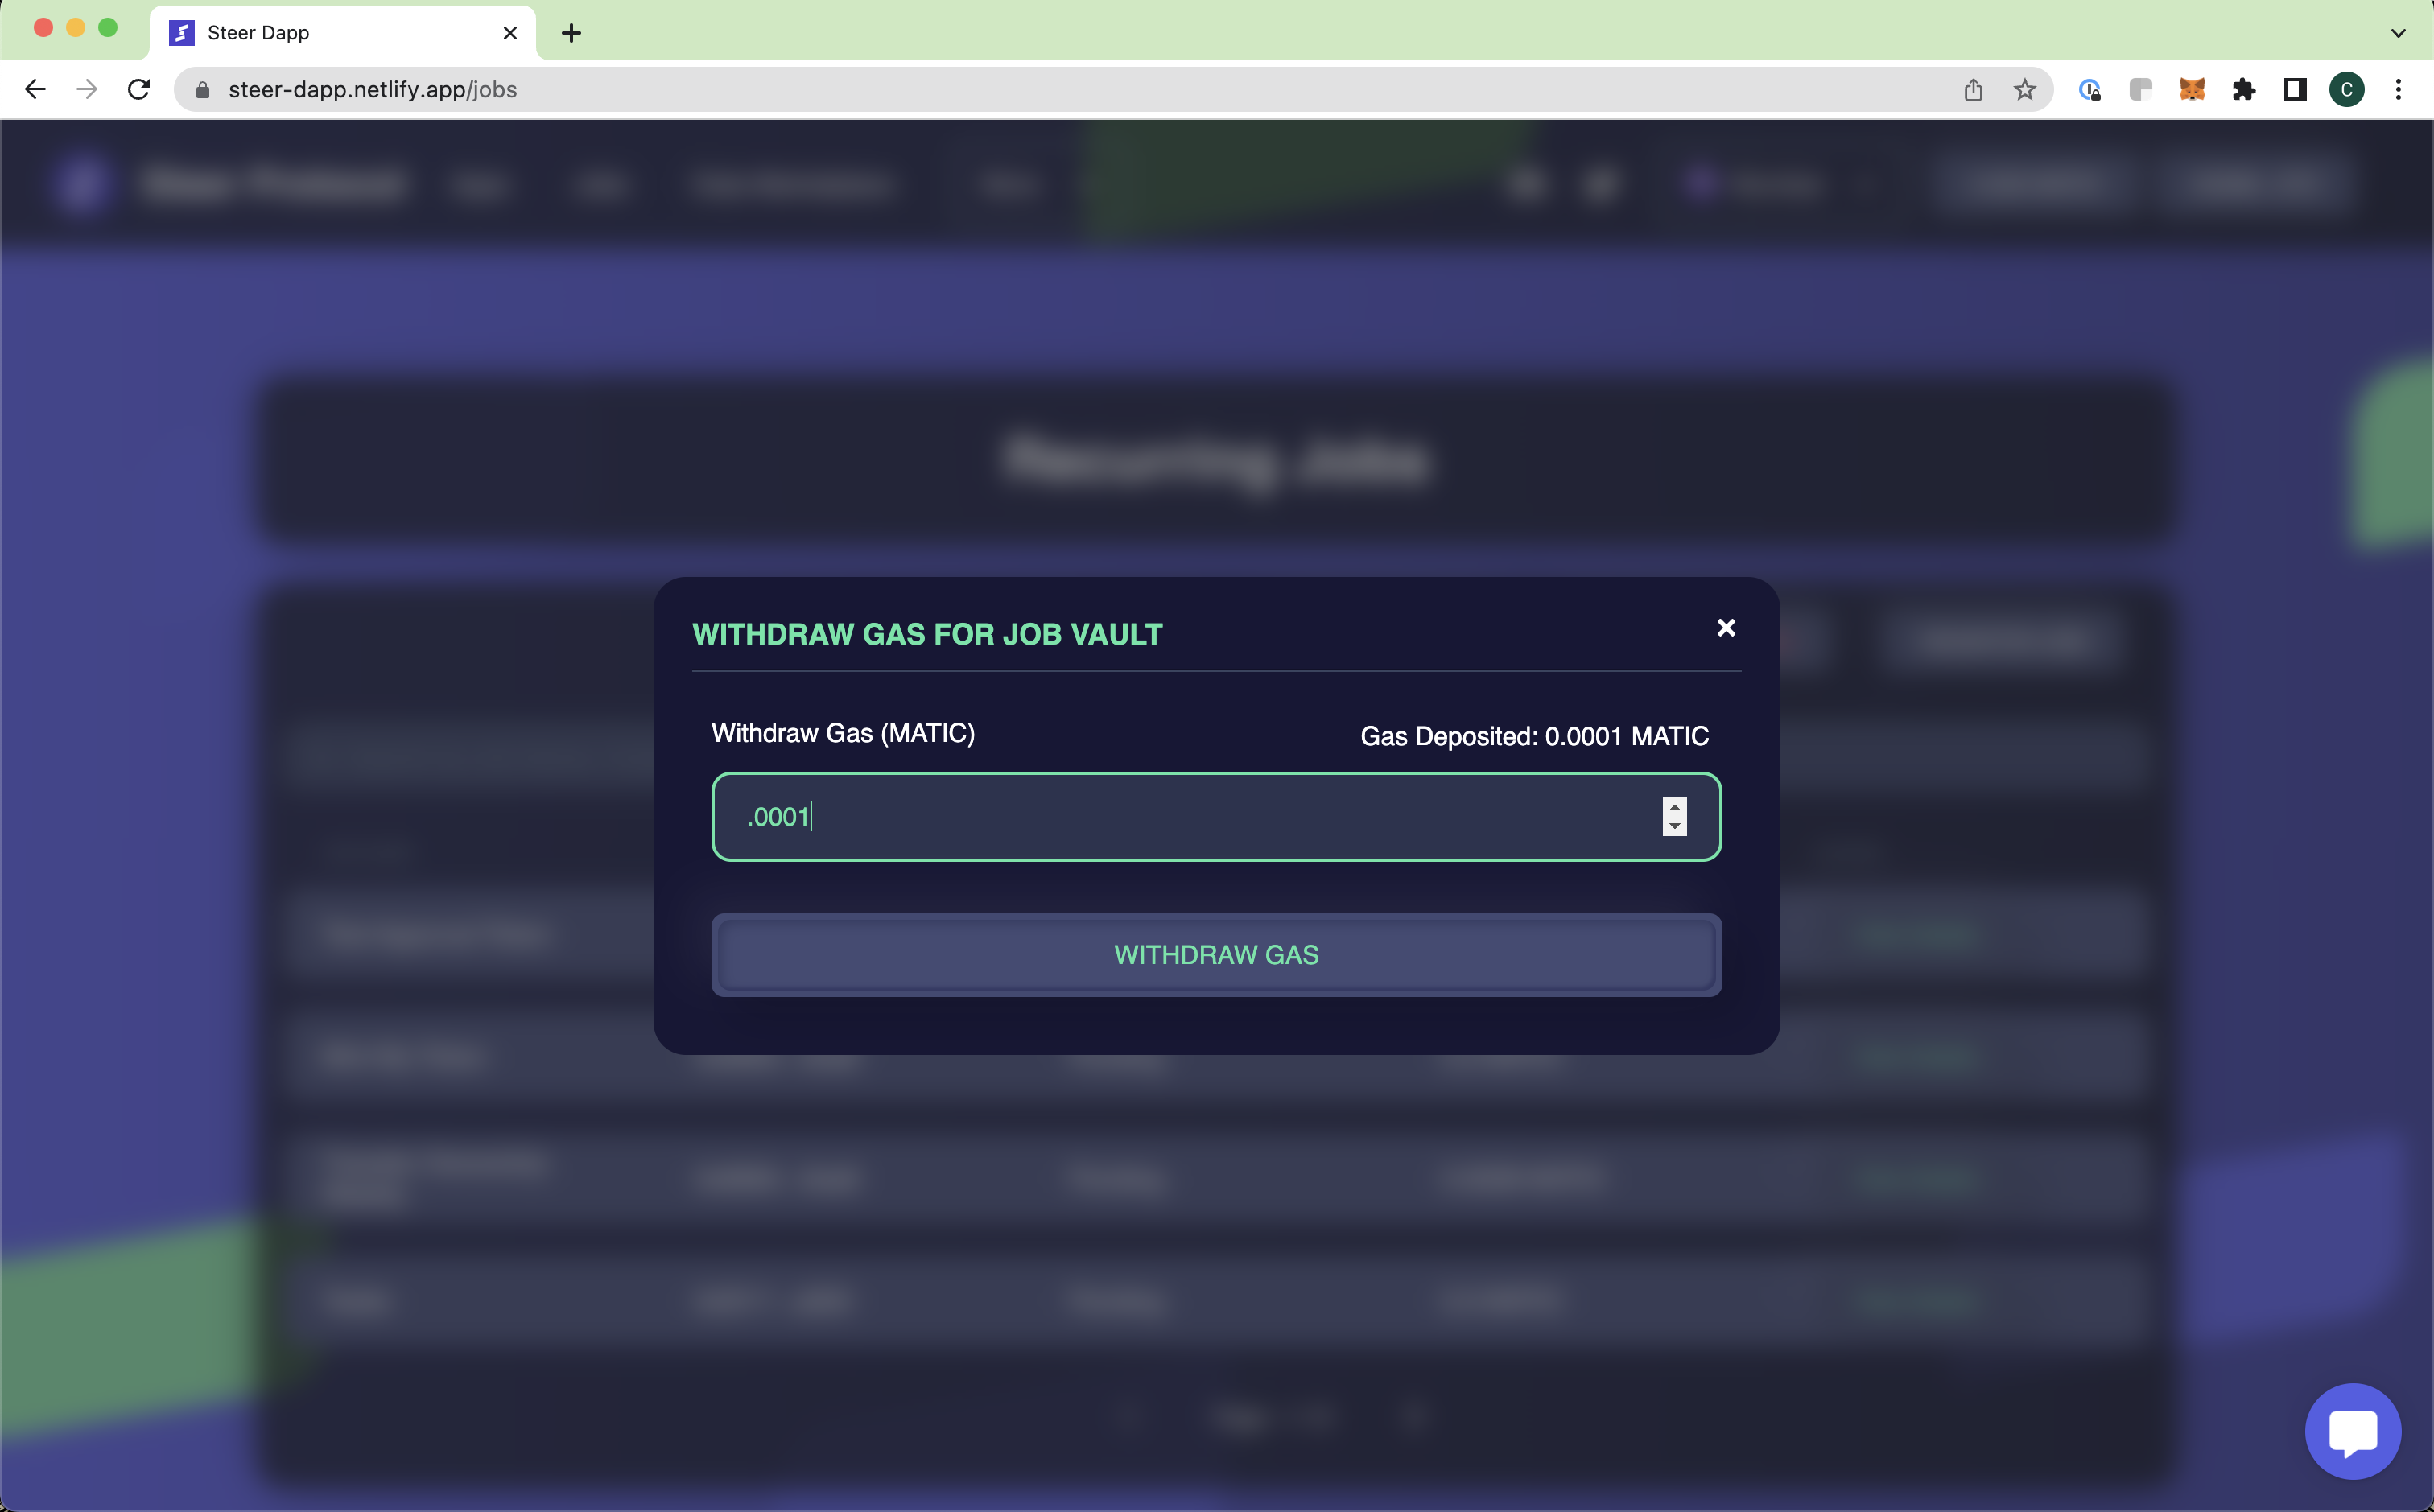
****Withdrawing Gas From a Job Vault****
Now! To withdraw assets from your vault, click on the red button marked “deposit.’
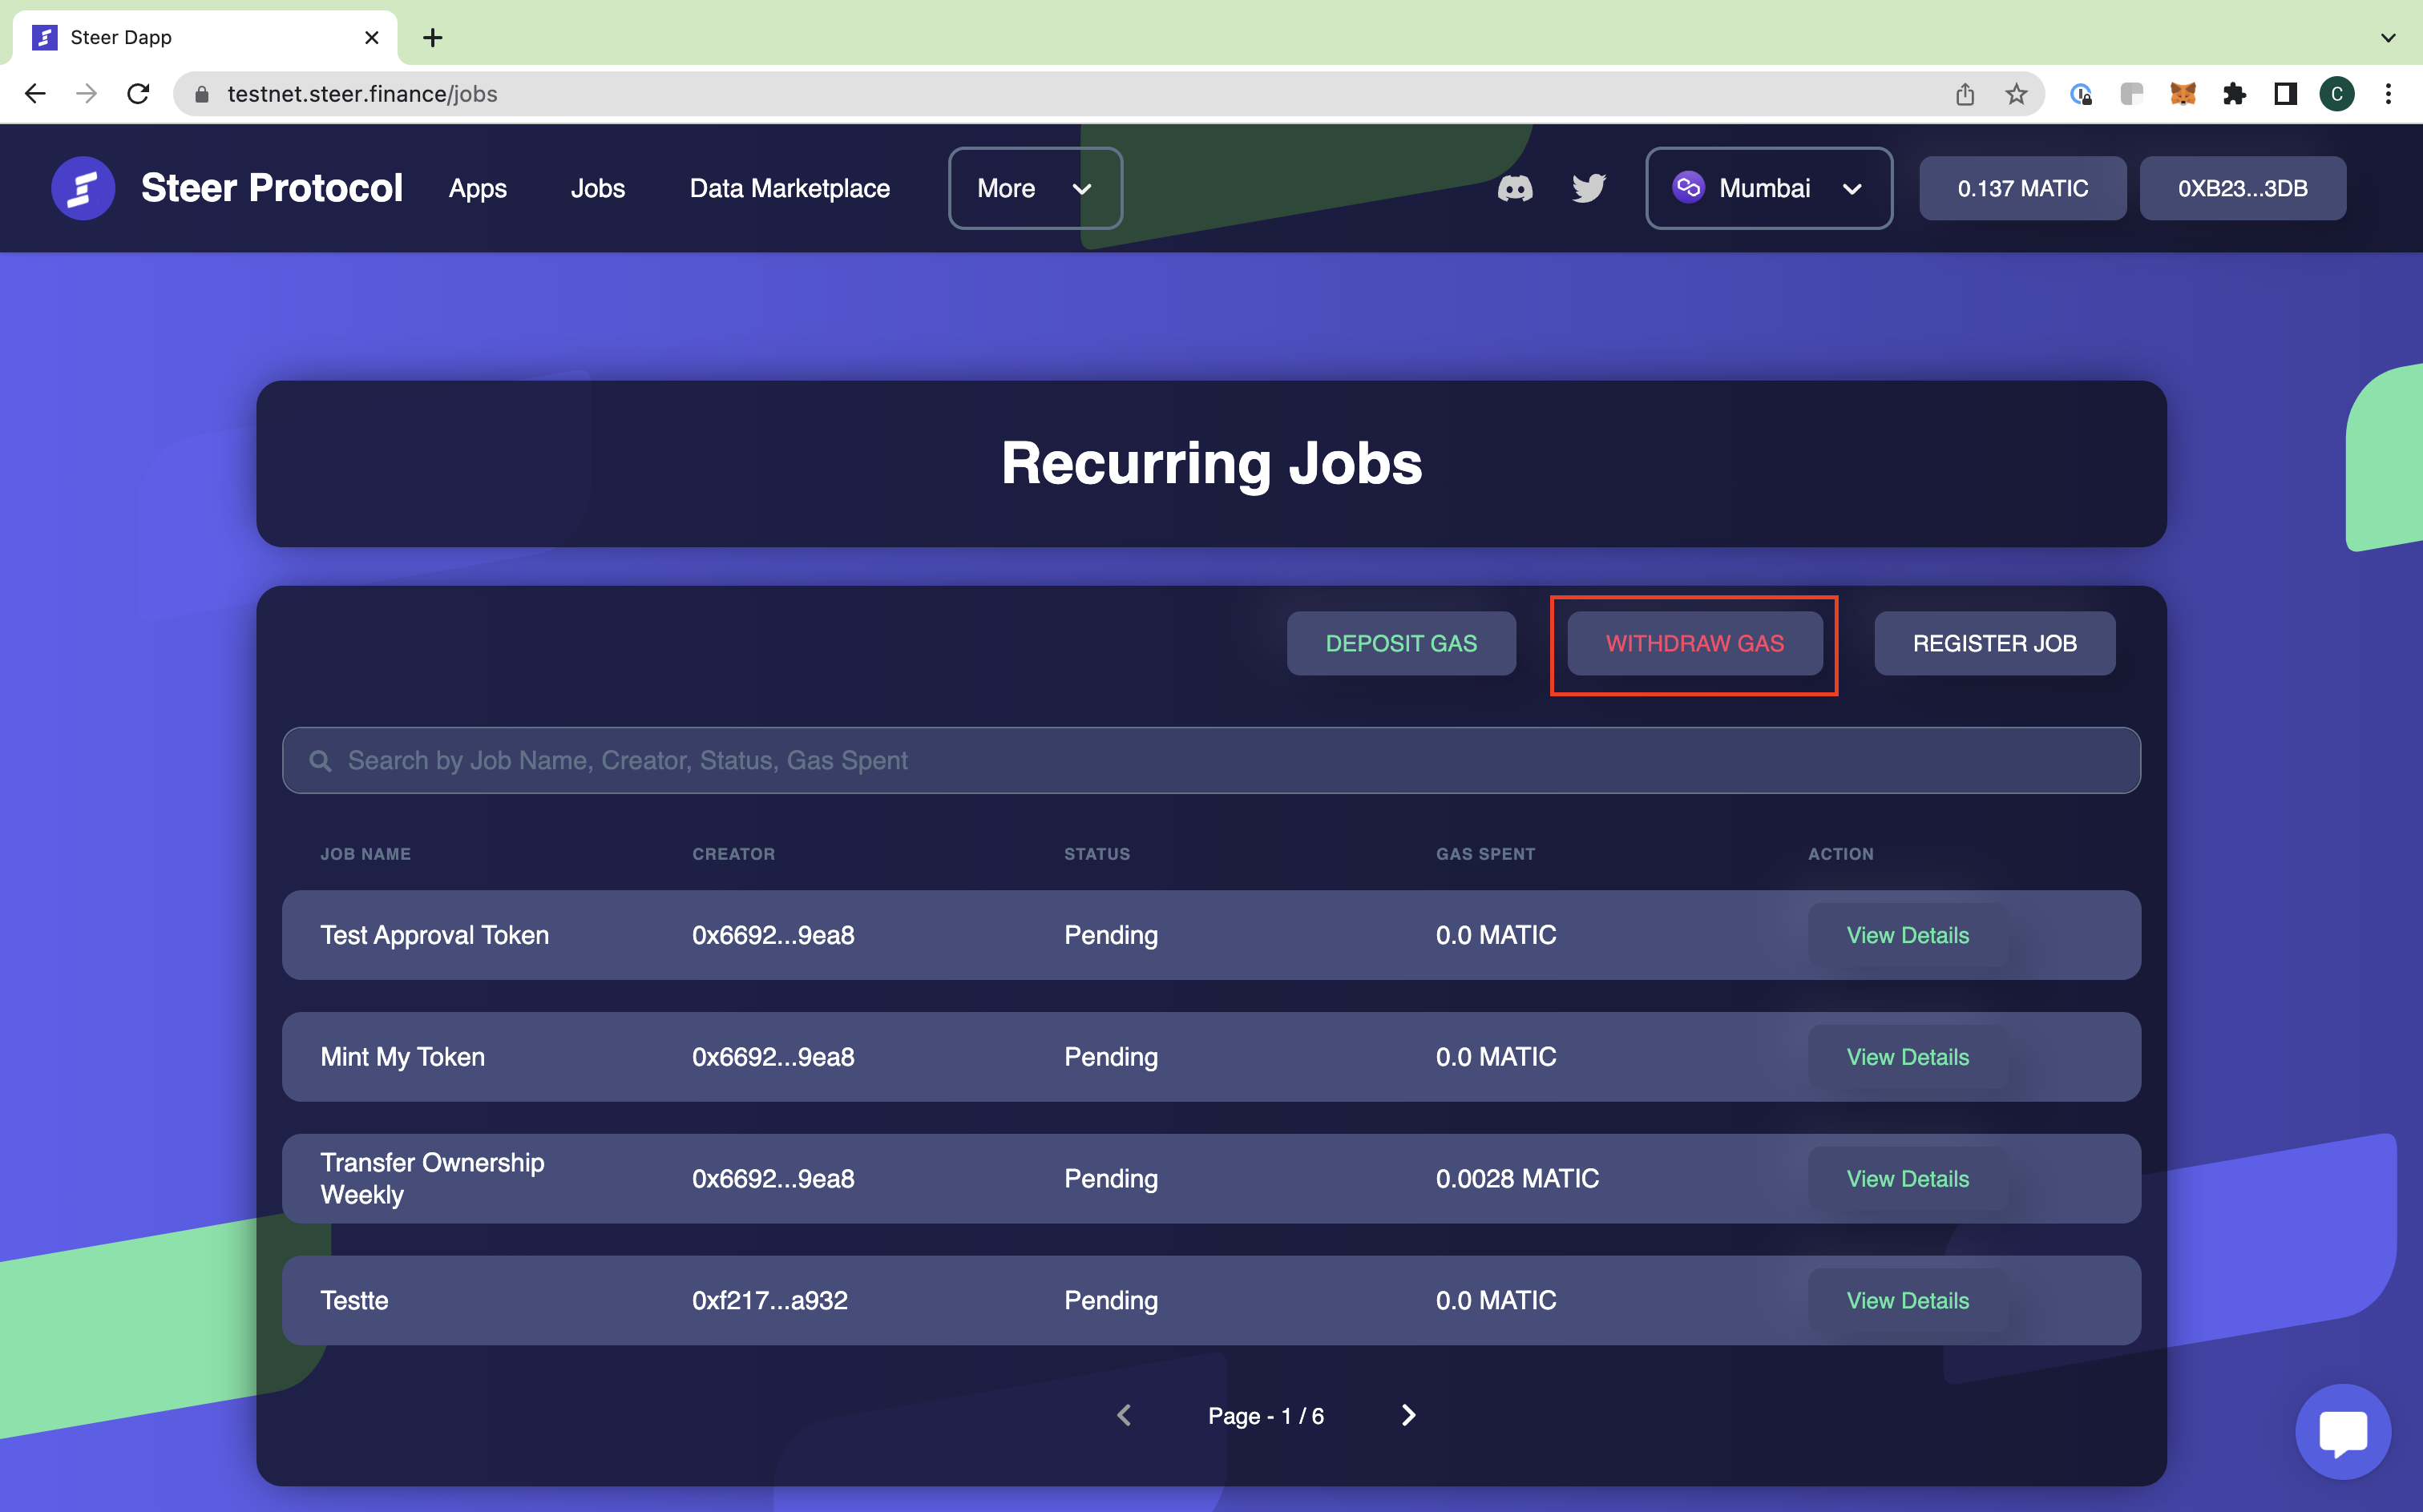
Like with depositing, you must select how much of your asset you’d like to withdraw from your vault in the entry field. You will then be prompted with a pop-up to confirm the applicable gas fees and execute the withdrawal, almost identical to the previous transaction but with the reverse function. Click withdraw to trigger a modal asking you to confirm the execution of the transaction. To do so, click “confirm.”
Well, look at you! Now that you know how to store liquidity in a vault and order transactions on the Steer platform, you're well on your way to taking investing in the full portfolio of DeFi tools Steer provides!